创建helm仓库
首先,创建基础Helm模版仓库:
对于实际的部署中,需要根据自己的业务定制自己的helm模版,我这里直接使用我们内部自定义的通用模版,方便快速部署;另外也可以参考bitnami家维护的helm chart(https://github.com/bitnami/charts/tree/master/bitnami)
jenkins凭证配置argocd token信息

配置jenkins pipeline编写
这里我们以gotest项目(https://code.test.cn/hqliang/gotest)为例
 1
 2
 3
 4
 5
 6
 7
 8
 9
10
11
12
13
14
15
16
17
18
19
20
21
22
23
24
25
26
27
28
29
30
31
32
33
34
35
36
37
38
39
40
41
42
43
44
45
46
47
48
49
50
51
52
53
| pipeline {
environment {
GOPROXY = "http://repo.test.cn/repository/goproxy/"
HUB_URL = "registry.test.cn"
ARGOCD_SERVER="qacd.test.cn"
ARGOCD_PROJ="test-project"
ARGOCD_APP="gotest"
ARGOCD_REPO="https://code.test.cn/devops/cicd/qa.git"
ARGOCD_PATH="devops/gotest"
ARGOCD_CLUSTER="https://172.16.19.250:8443"
ARGOCD_NS="default"
}
agent {
node {
label 'aiops'
}
}
stages {
stage ('Docker_Build') {
steps {
withCredentials([[$class: 'UsernamePasswordMultiBinding',
credentialsId: '12ff2942-972c-4df3-8d2d-2cfcb25e00de',
usernameVariable: 'DOCKER_HUB_USER',
passwordVariable: 'DOCKER_HUB_PASSWORD']]) {
sh '''
TAG=$(git describe --tags `git rev-list --tags --max-count=1`)
docker login registry.test.cn -u ${DOCKER_HUB_USER} -p ${DOCKER_HUB_PASSWORD}
make docker-all VERSION=$TAG
'''
}
}
}
stage ('Deploy_K8S') {
steps {
withCredentials([string(credentialsId: "qa-argocd", variable: 'ARGOCD_AUTH_TOKEN')]) {
sh '''
TAG=$(git describe --tags `git rev-list --tags --max-count=1`)
# create app
ARGOCD_SERVER=$ARGOCD_SERVER argocd --grpc-web app create $ARGOCD_APP --project $ARGOCD_PROJ --repo $ARGOCD_REPO --path $ARGOCD_PATH --dest-namespace $ARGOCD_NS --dest-server $ARGOCD_CLUSTER --upsert --insecure
# deploy app
ARGOCD_SERVER=$ARGOCD_SERVER argocd --grpc-web app set $ARGOCD_APP -p containers.tag=$TAG --insecure
# Deploy to ArgoCD
ARGOCD_SERVER=$ARGOCD_SERVER argocd --grpc-web app sync $ARGOCD_APP --force --insecure
ARGOCD_SERVER=$ARGOCD_SERVER argocd --grpc-web app wait $ARGOCD_APP --timeout 600 --insecure
'''
}
}
}
}
}
|
配置gitlab webhook触发Jenkins
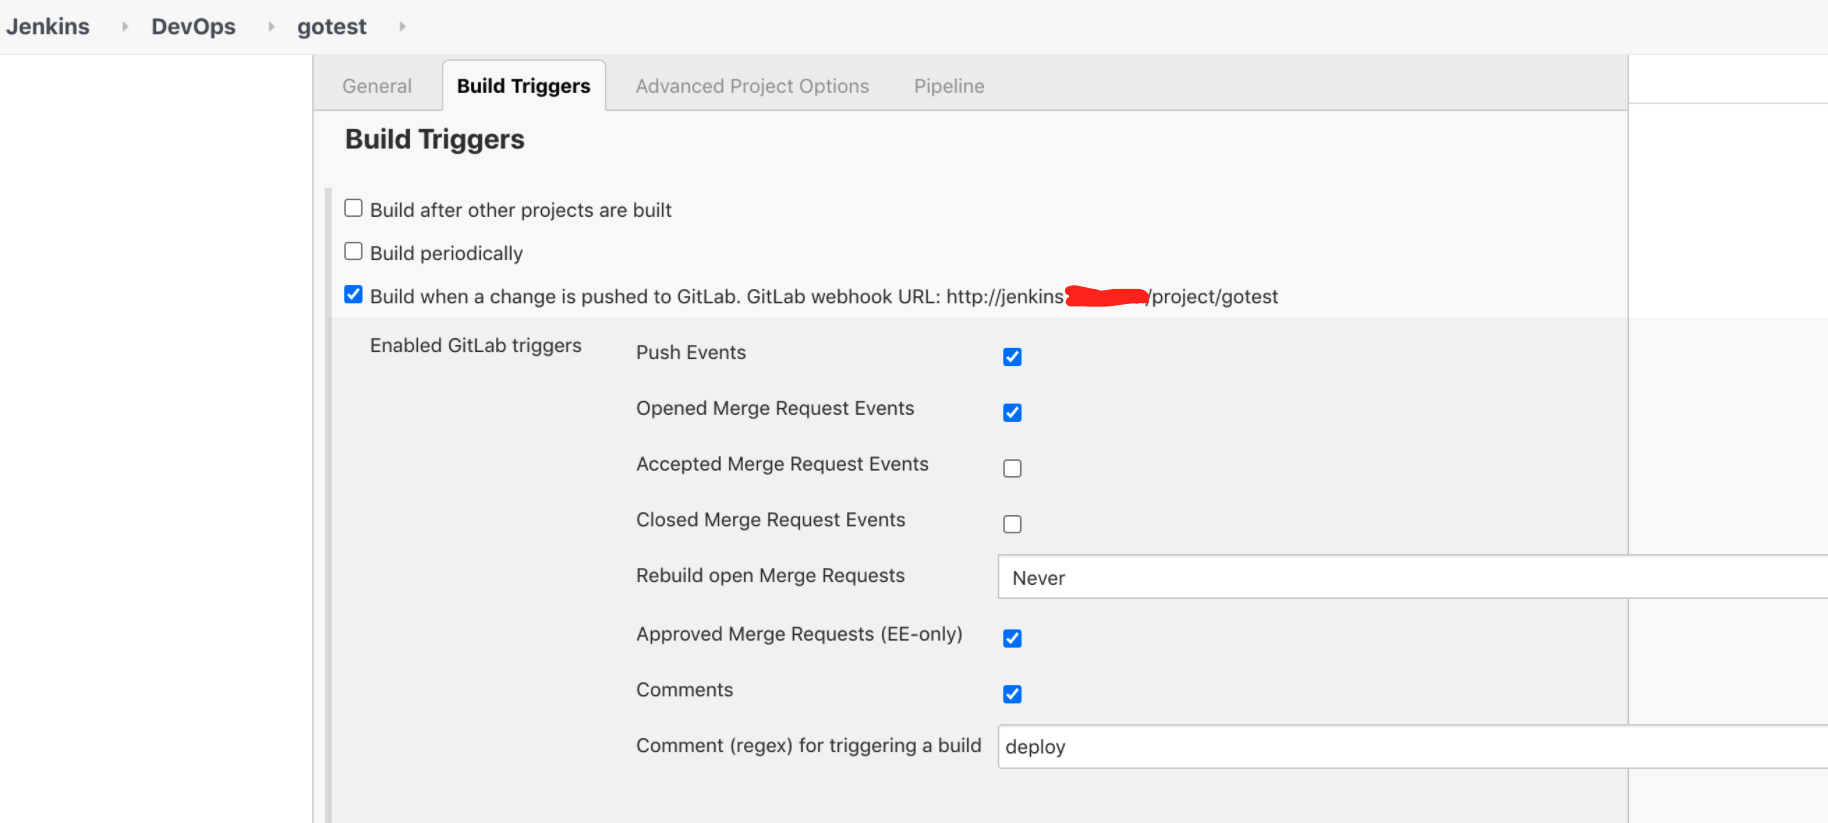
jenkins配置触发构建
gitlab配置webhook
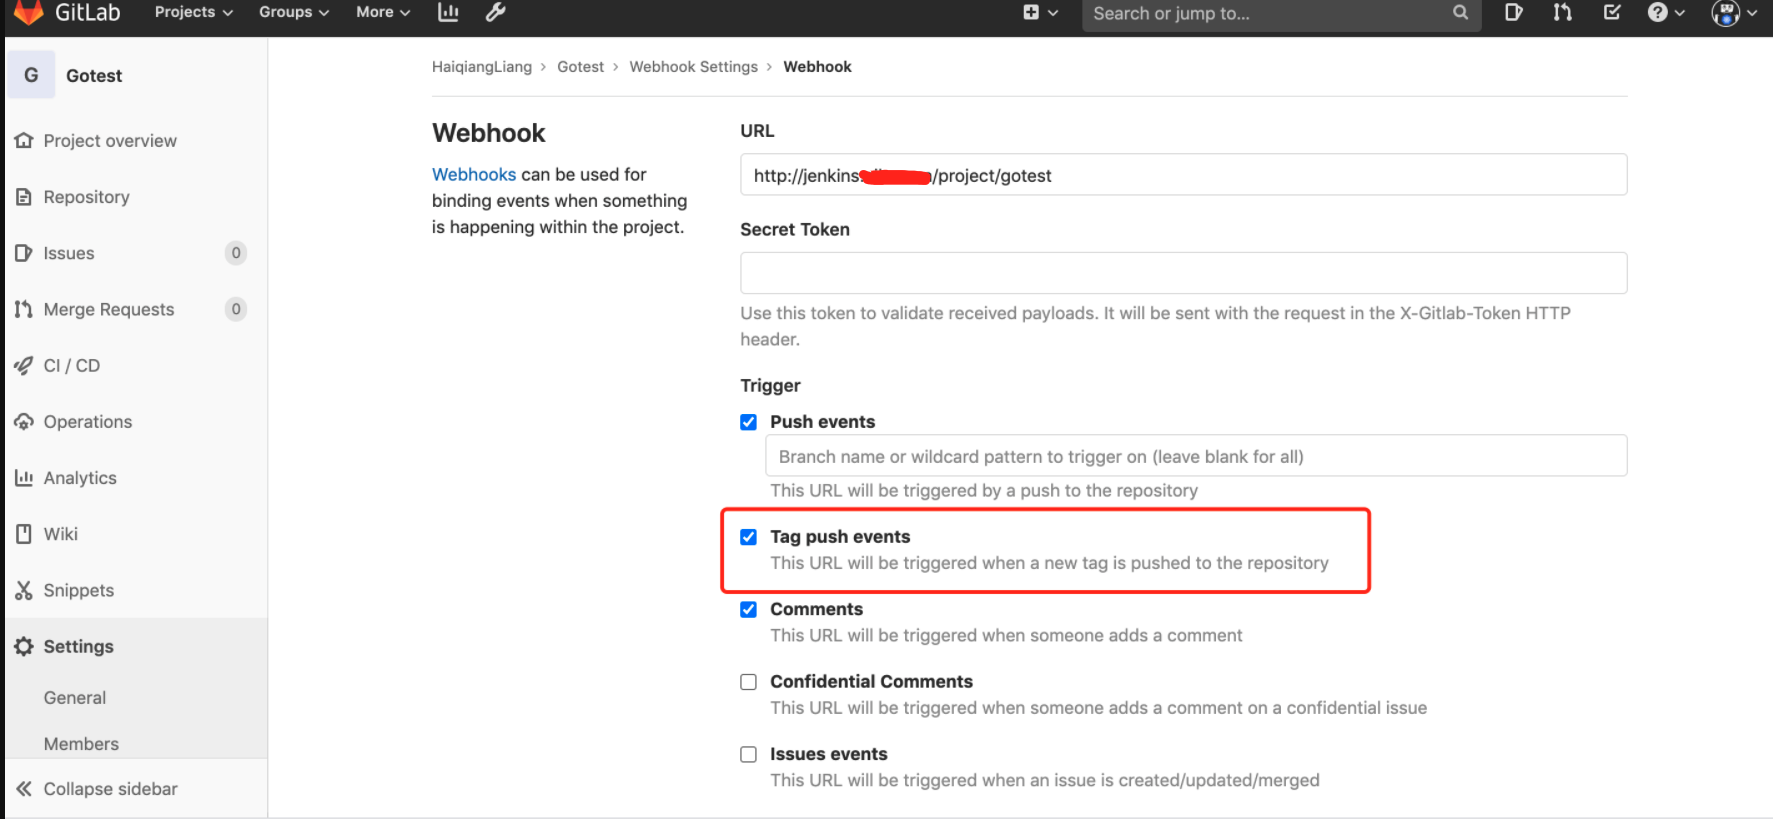
推送tag到远端分支

jenkins pipeline构建
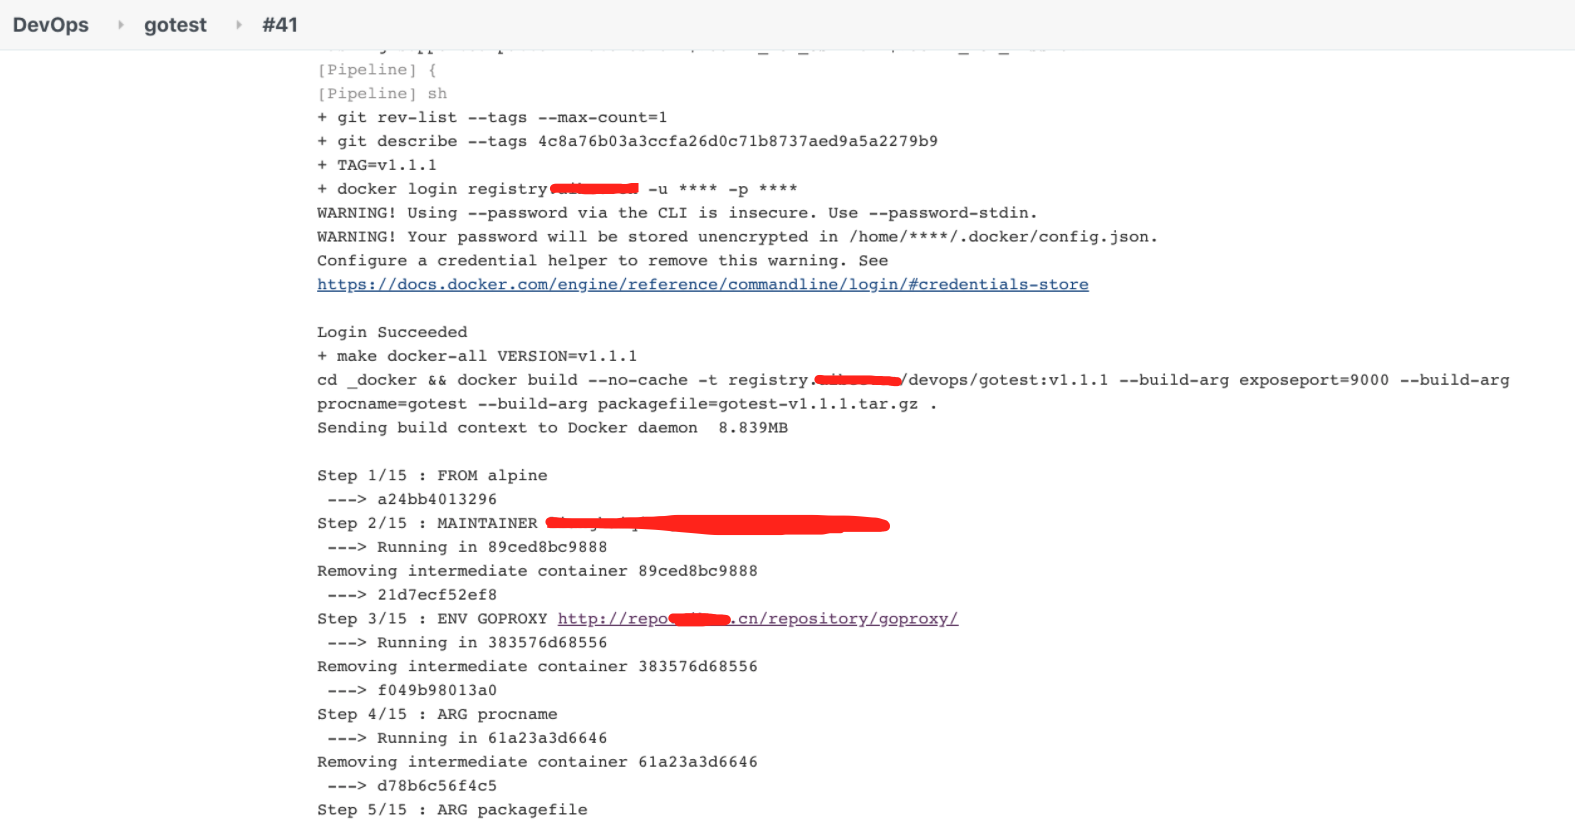
到jenkins查看pipeline构建结果如下:
docker自动打包并推送到harbor上
创建Argo应用并同步部署到k8s集群
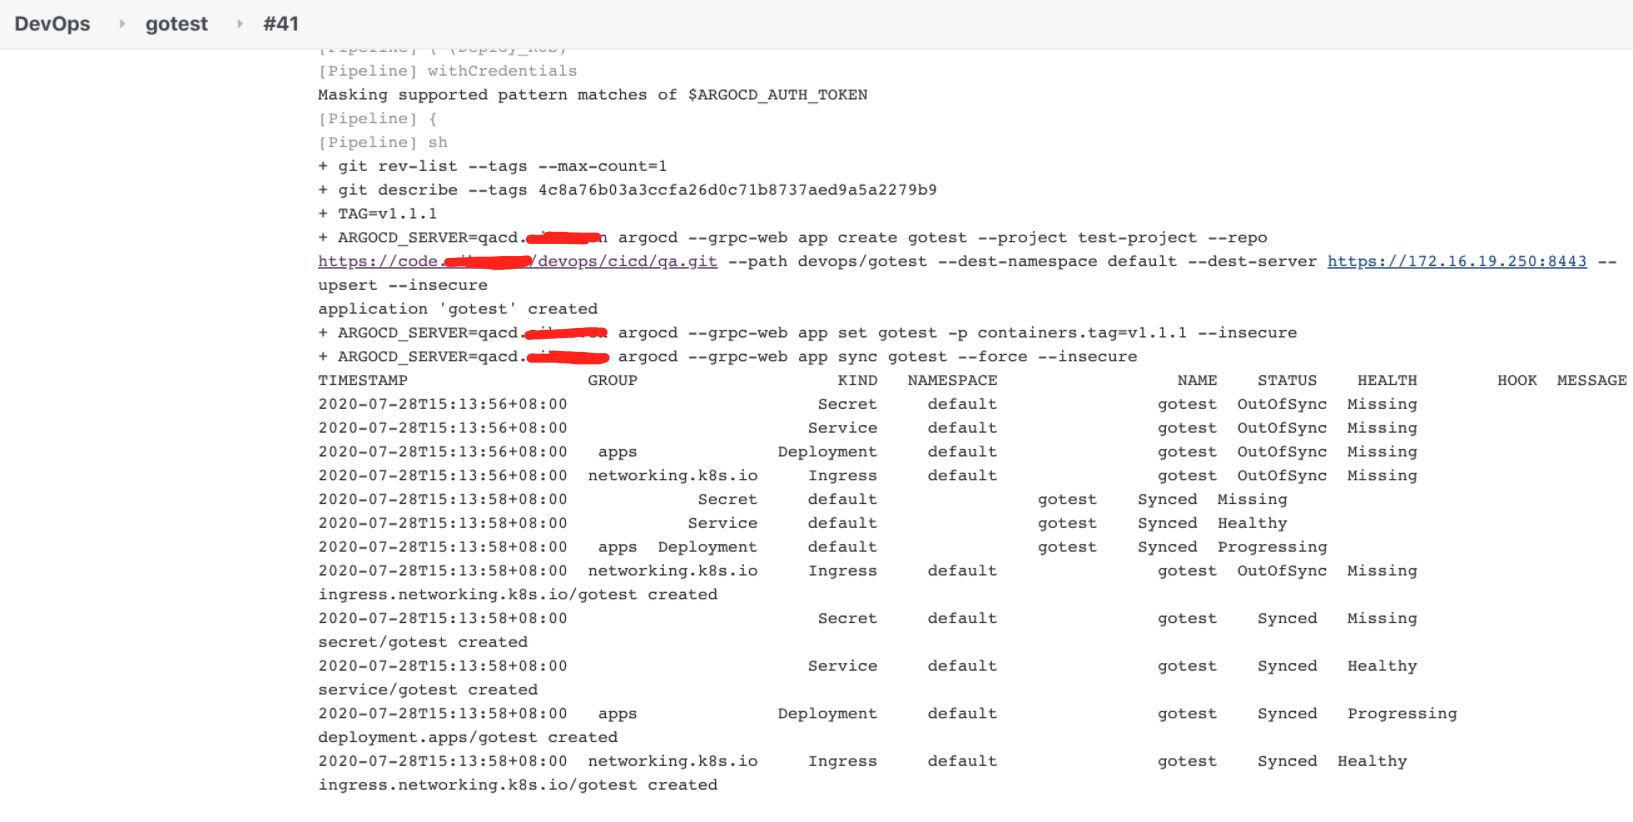
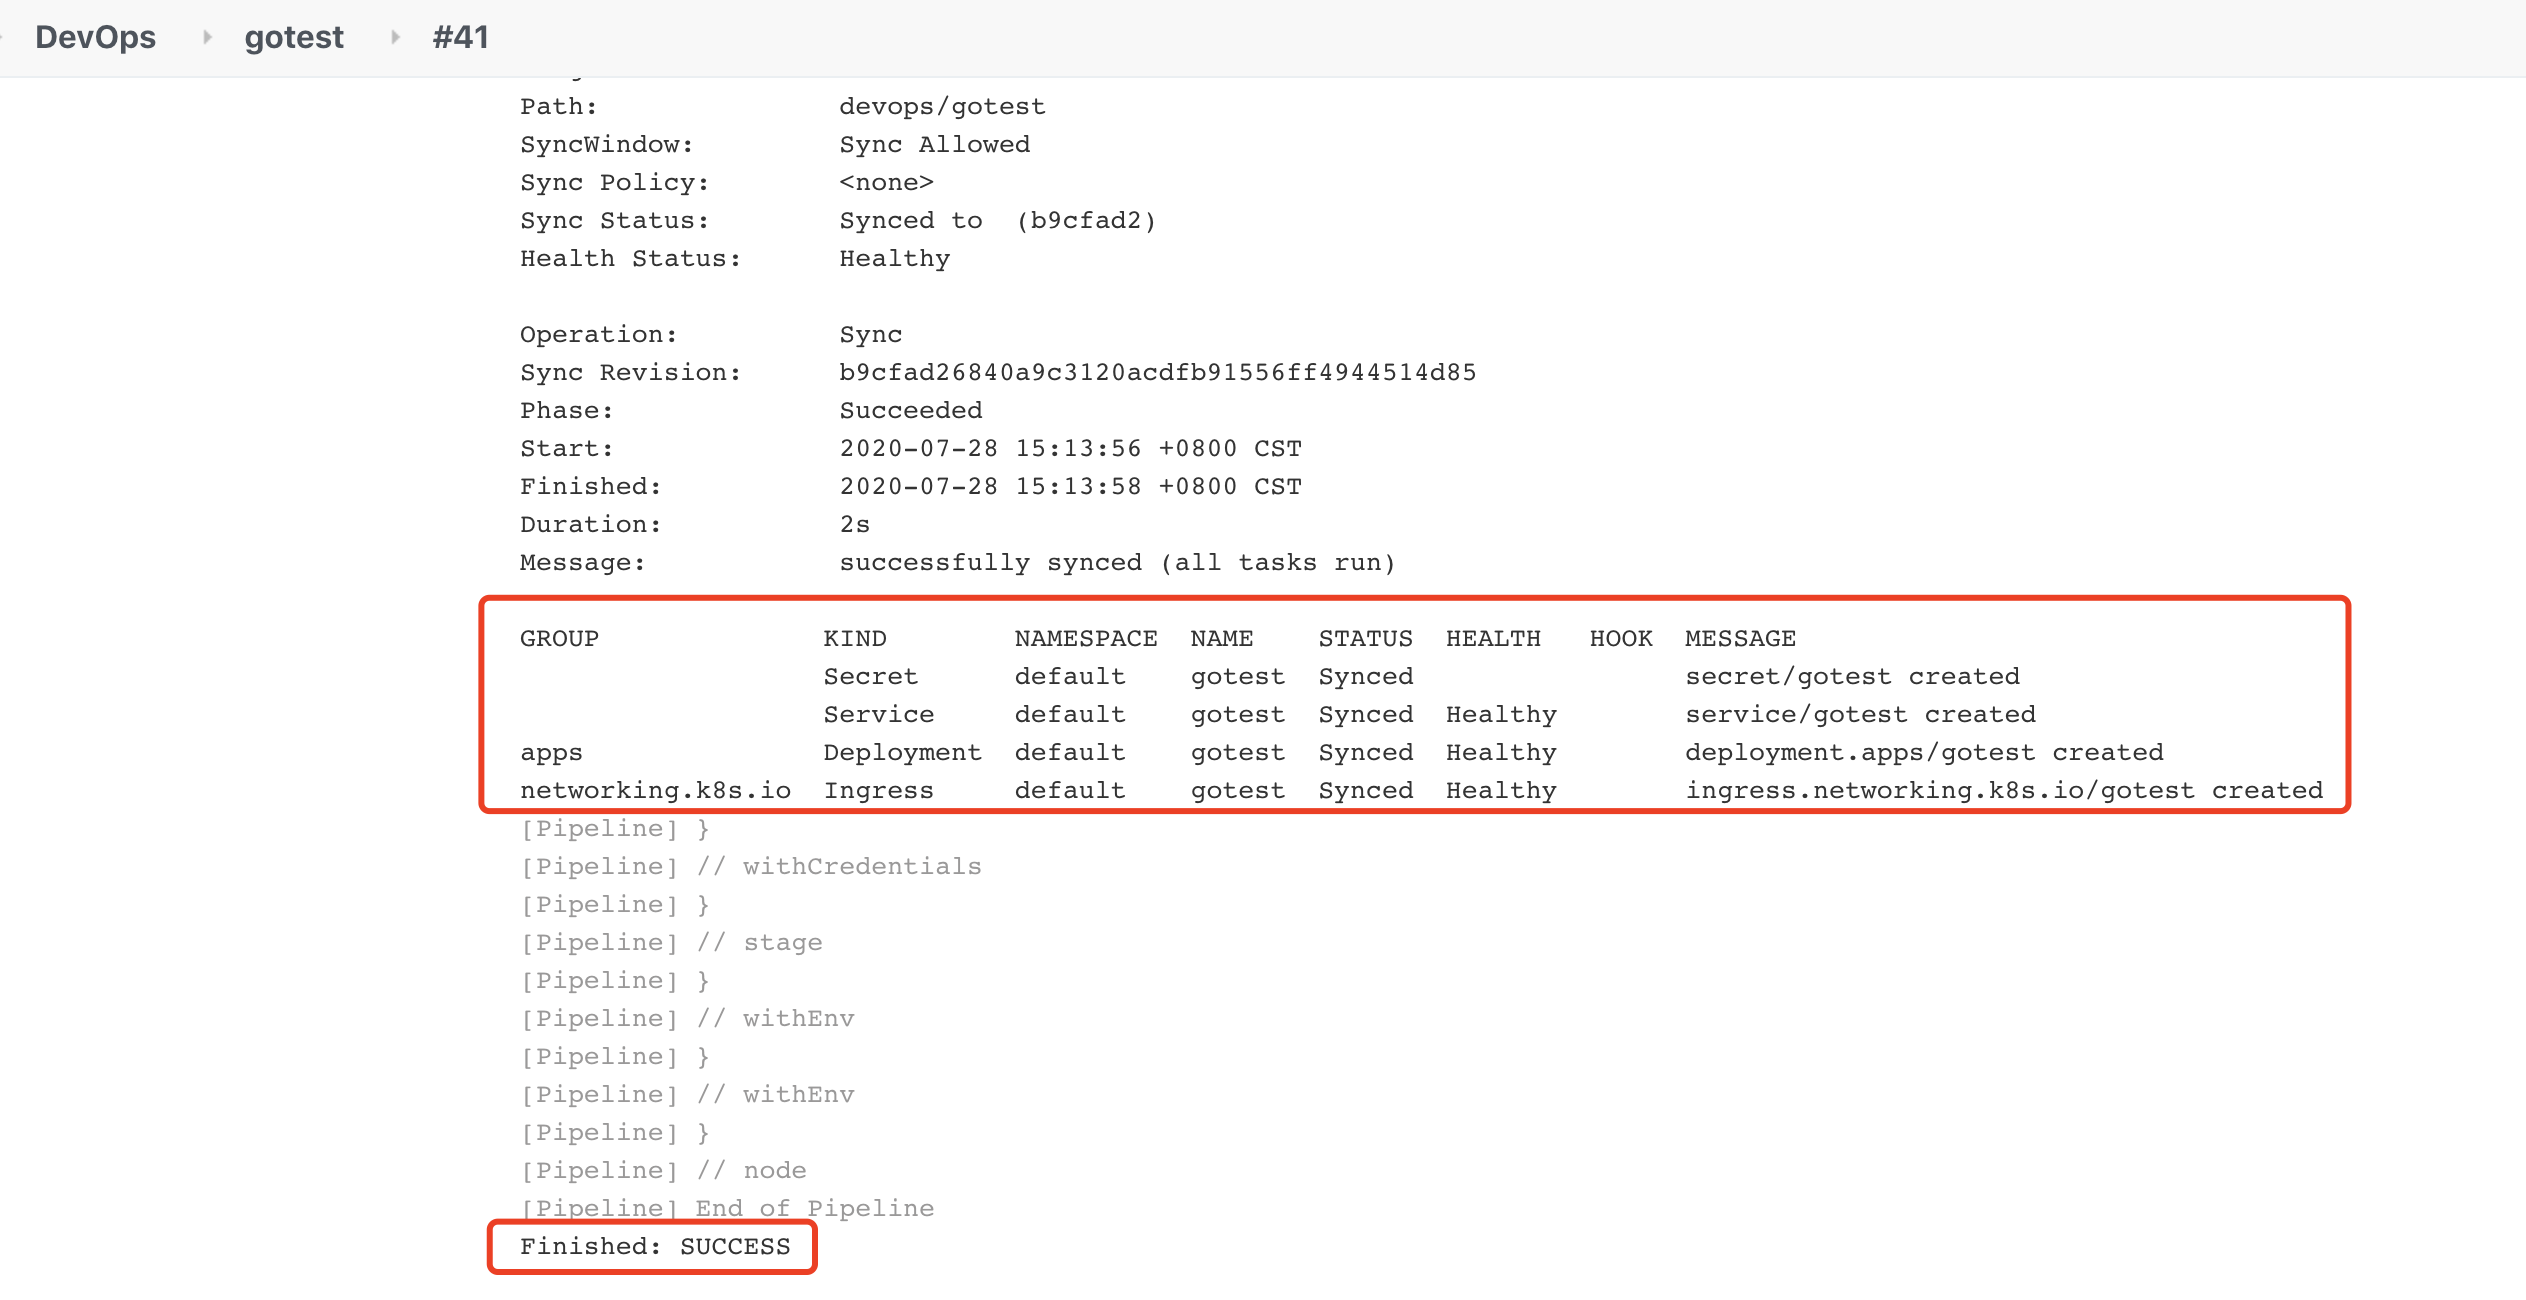
最后查看同步状态,途中说明已经正常发布到k8s集群:
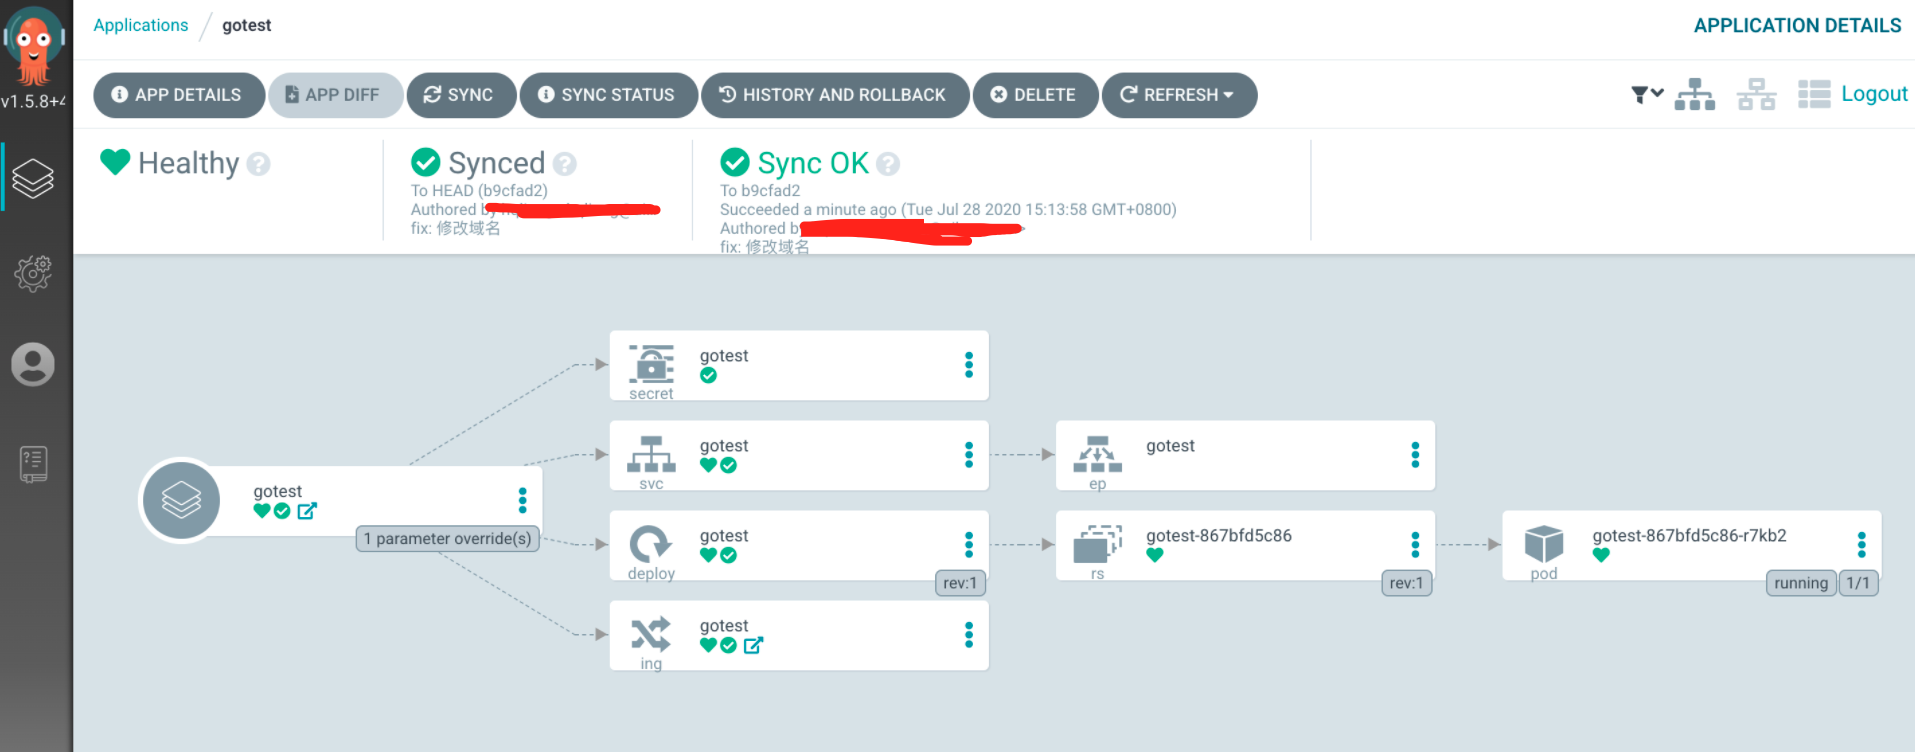
我们到argocd的dashboard看一下应用流程图,应用各个组件已经正常运行。
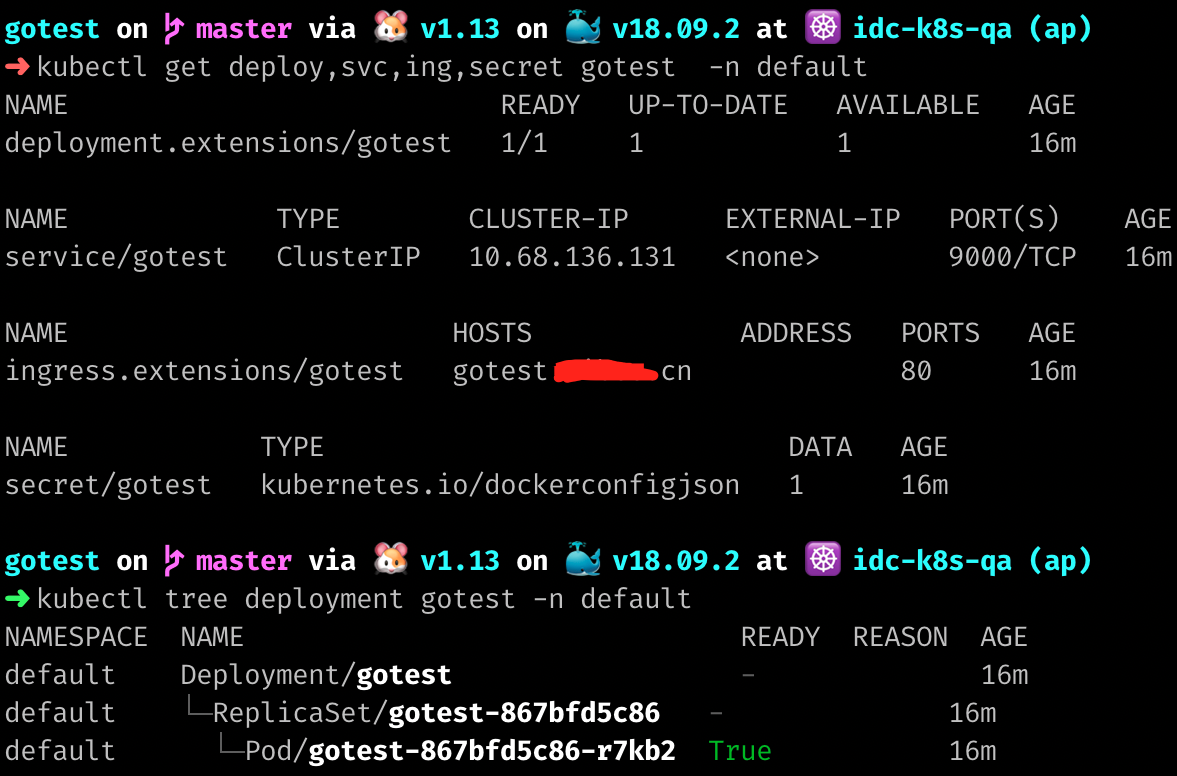
通过kubectl获取已经创建好的资源:
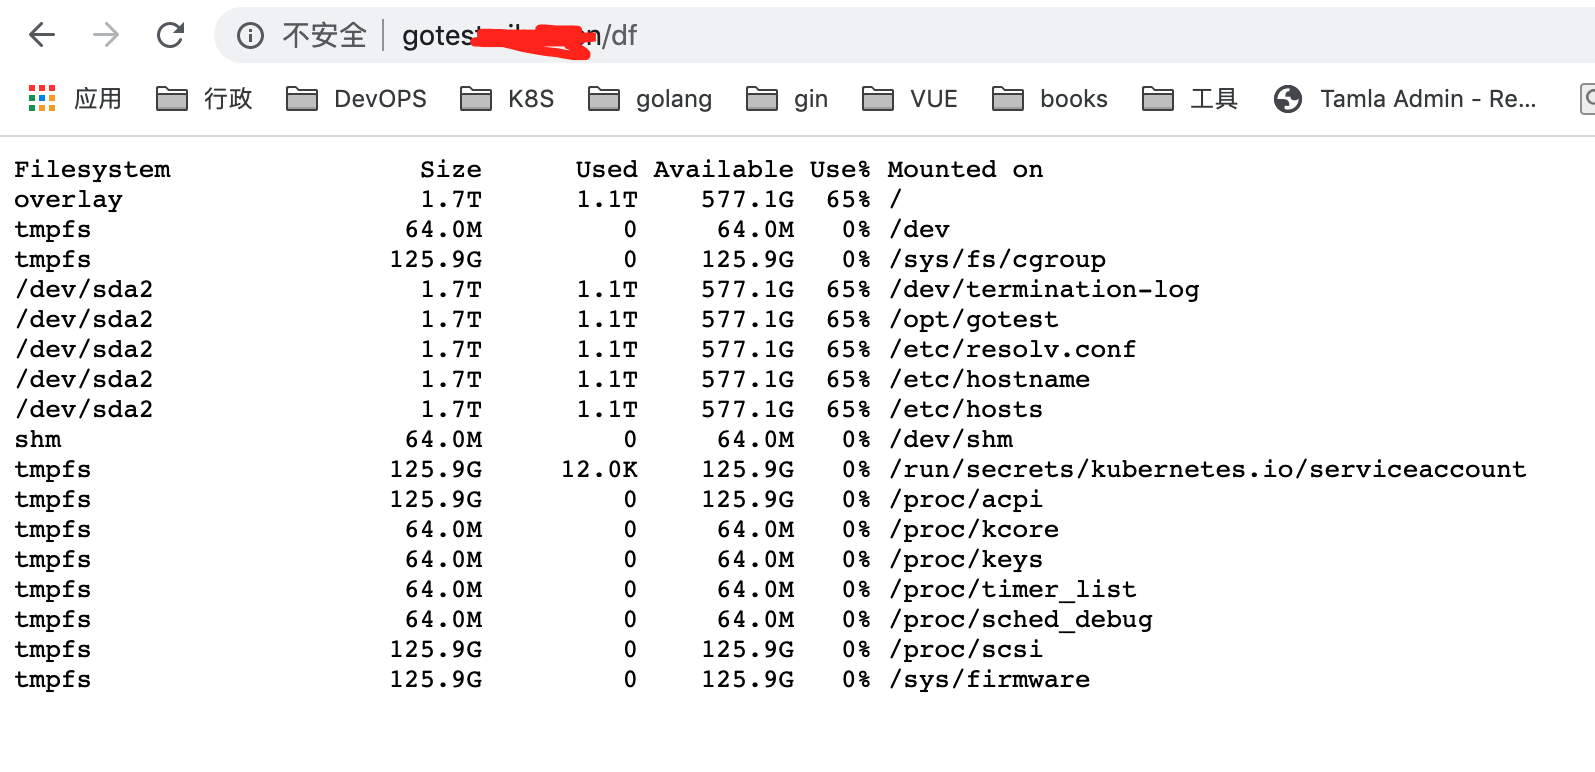
最后验证一下业务是否可以访问呢,访问http://gotest.test.cn/df 即可查看容器磁盘空间
总结&优化
无论通过jenkins的pipeline还是通过gitlab CI我们都可以更好的整合argocd,最终实现一键部署业务应用.


