Deploy Jenkins in kubernetes environment
1. Install and deploy Jenkins
1. Manual installation
Manual installation is very simple. Just prepare the yaml configuration in advance. The content of all CICD resources jenkins-install.yaml is as follows:
| |
The entire installation process involves the following resource configuration:
- Local storage: hostpath method
- Authorization related: ServiceAccount, Clusterrole, ClusterRoleBinding
- Deployment and service: deployment, service, ingress
2. Configure Jenkins
It should be noted here that since jenkens will perform a signature verification security check on update-center.json, we need to close it in advance, otherwise the following change of the plug-in source may fail. You can configure the environment variable JAVA_OPTS=-Dhudson.model.DownloadService.noSignatureCheck=true;
After installing Jenkins, open https://jenkins.test.com, which will ask you to enter the Jenkins administrator password, which can be obtained in the following way:
Then skip the plugin installation. Select the default plugin installation process, which will be very slow (you can also choose to install recommended plugins). Click the upper right corner to close the plugin selection. After configuring the domestic mirror source of the plugin center, choose to install some plugins.
Open: https://jenkins.test.com/chinese/ Configure the domestic mirror source address. I choose Alibaba Cloud (https://mirrors.aliyun.com/jenkins/updates/update-center.json):
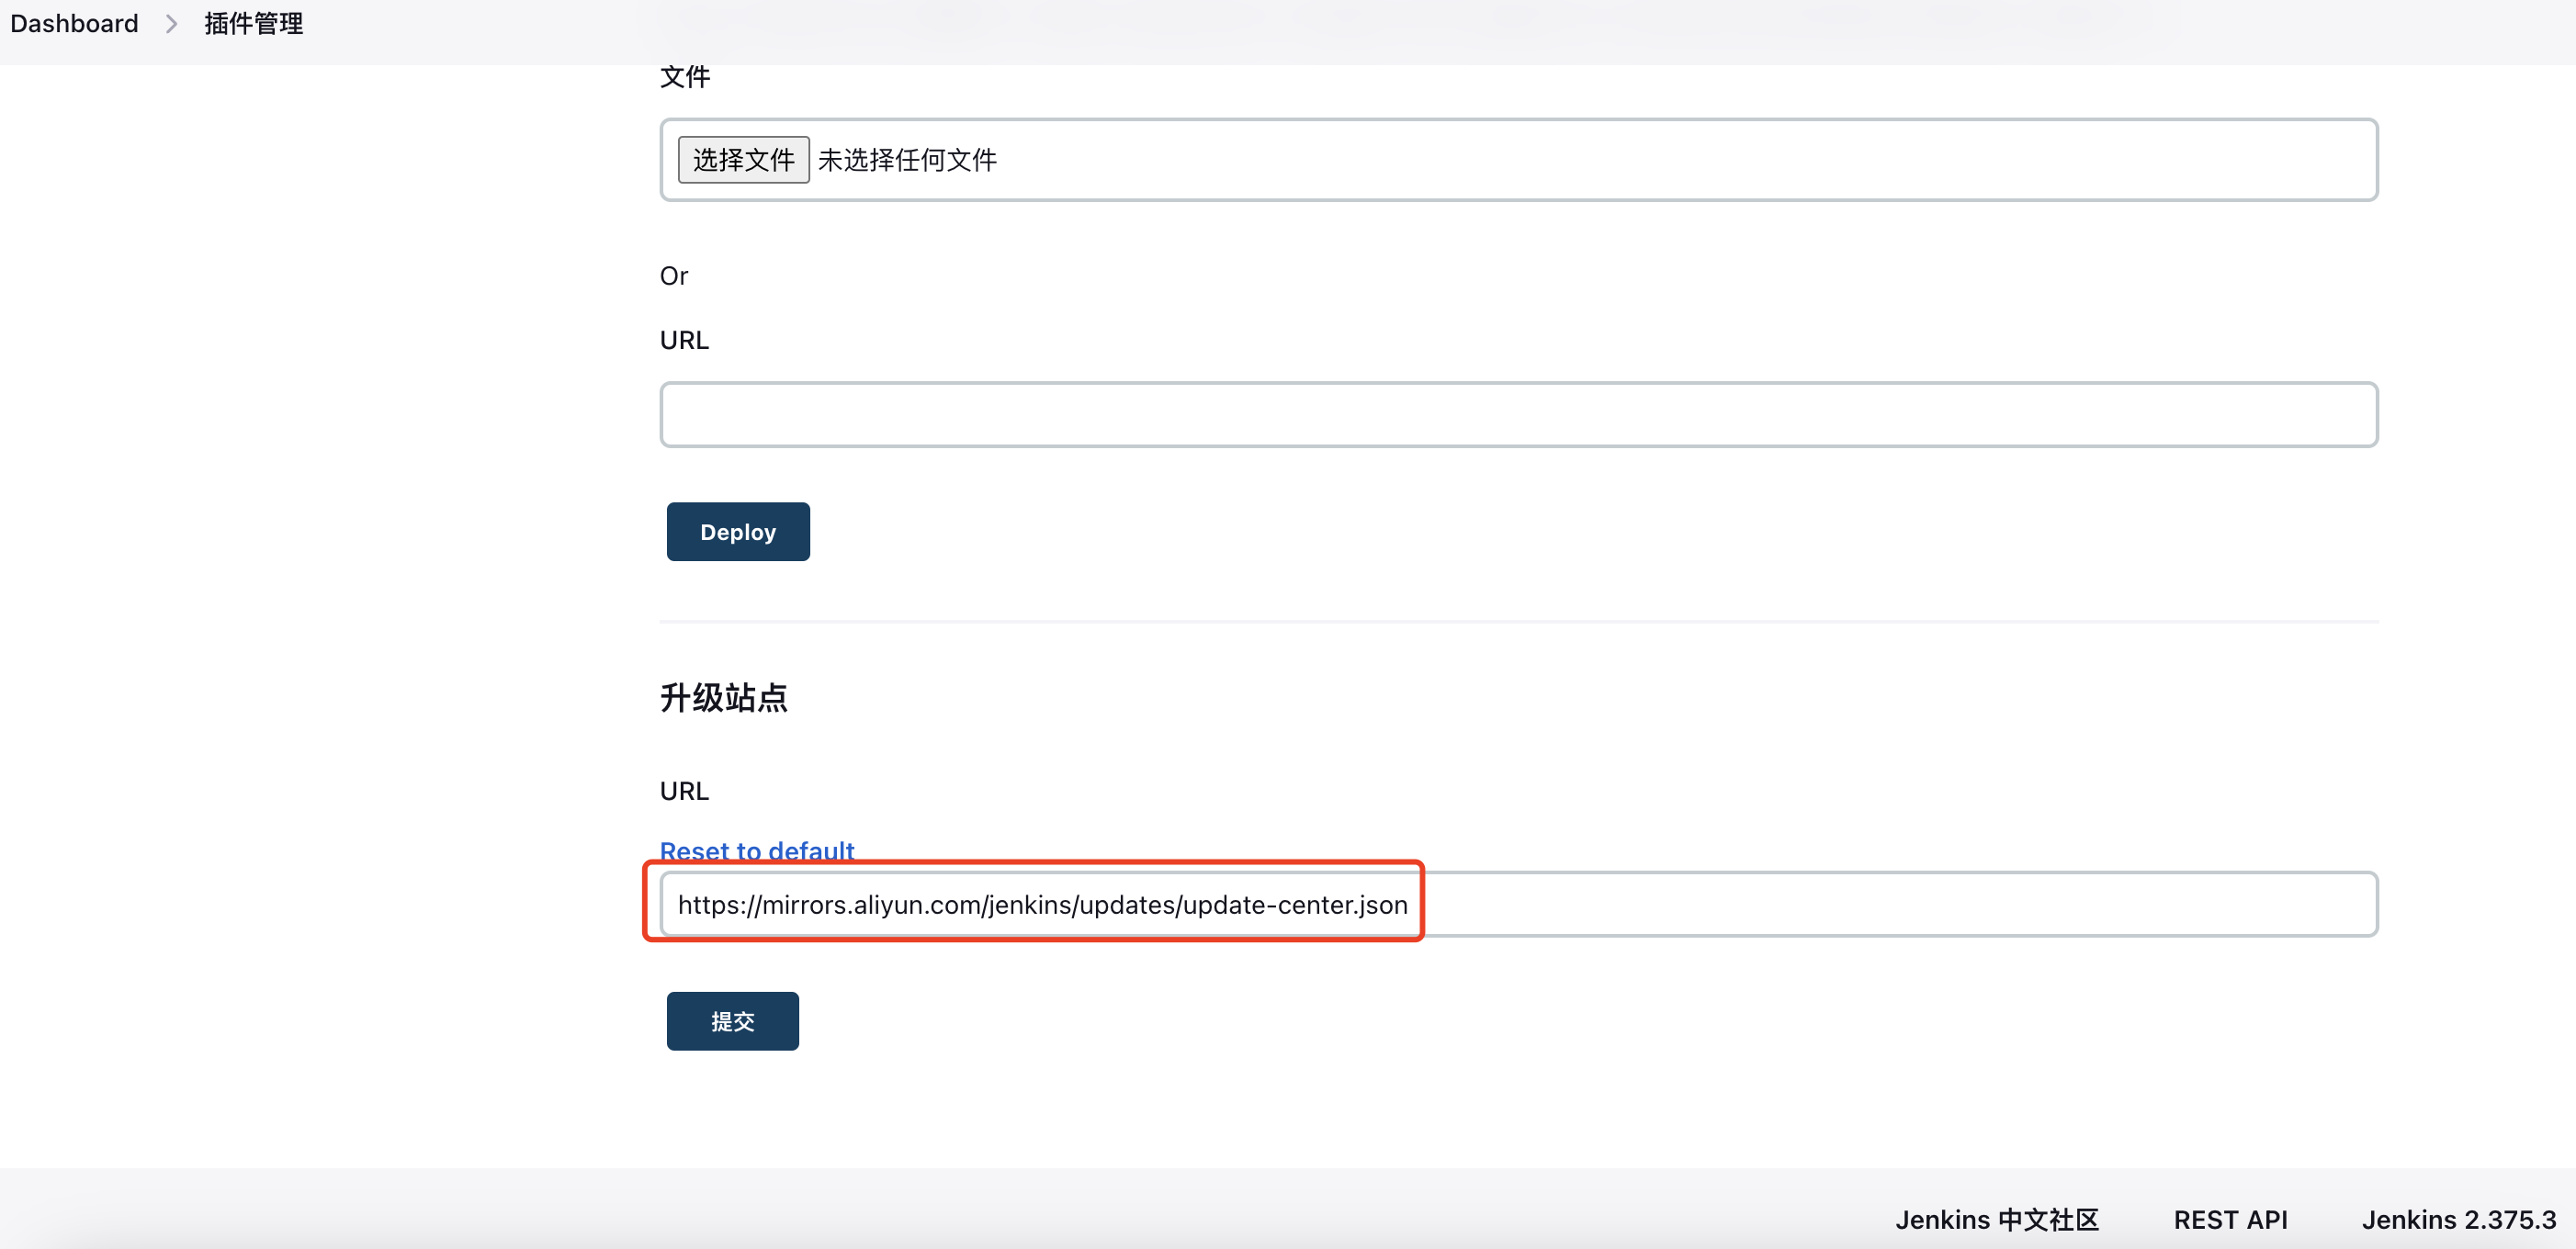
3. Install plug-ins
https://jenkins.test.com/manage/pluginManager/available
I mainly install kubernetes, Chinese language pack, pipeline, etc. The specific installation steps are omitted here.
- Jenkins Chinese version: https://plugins.jenkins.io/localization-zh-cn/ * Build With Parameters: https://plugins.jenkins.io/build-with-parameters * Kubernetes: https://plugins.jenkins.io/kubernetes/ * Pipeline: https://plugins.jenkins.io/workflow-aggregator/ * Git: https://plugins.jenkins.io/git/ * zentimestamp: https://plugins. jenkins.io/zentimestamp/ ## 2. Connect to Kubernetes cluster ### 1. k8s cluster information configuration
Open https://jenkins.test.com/configureClouds/
Create a new cluster directly, select kubernetes, and configure the cluster address and namespace:
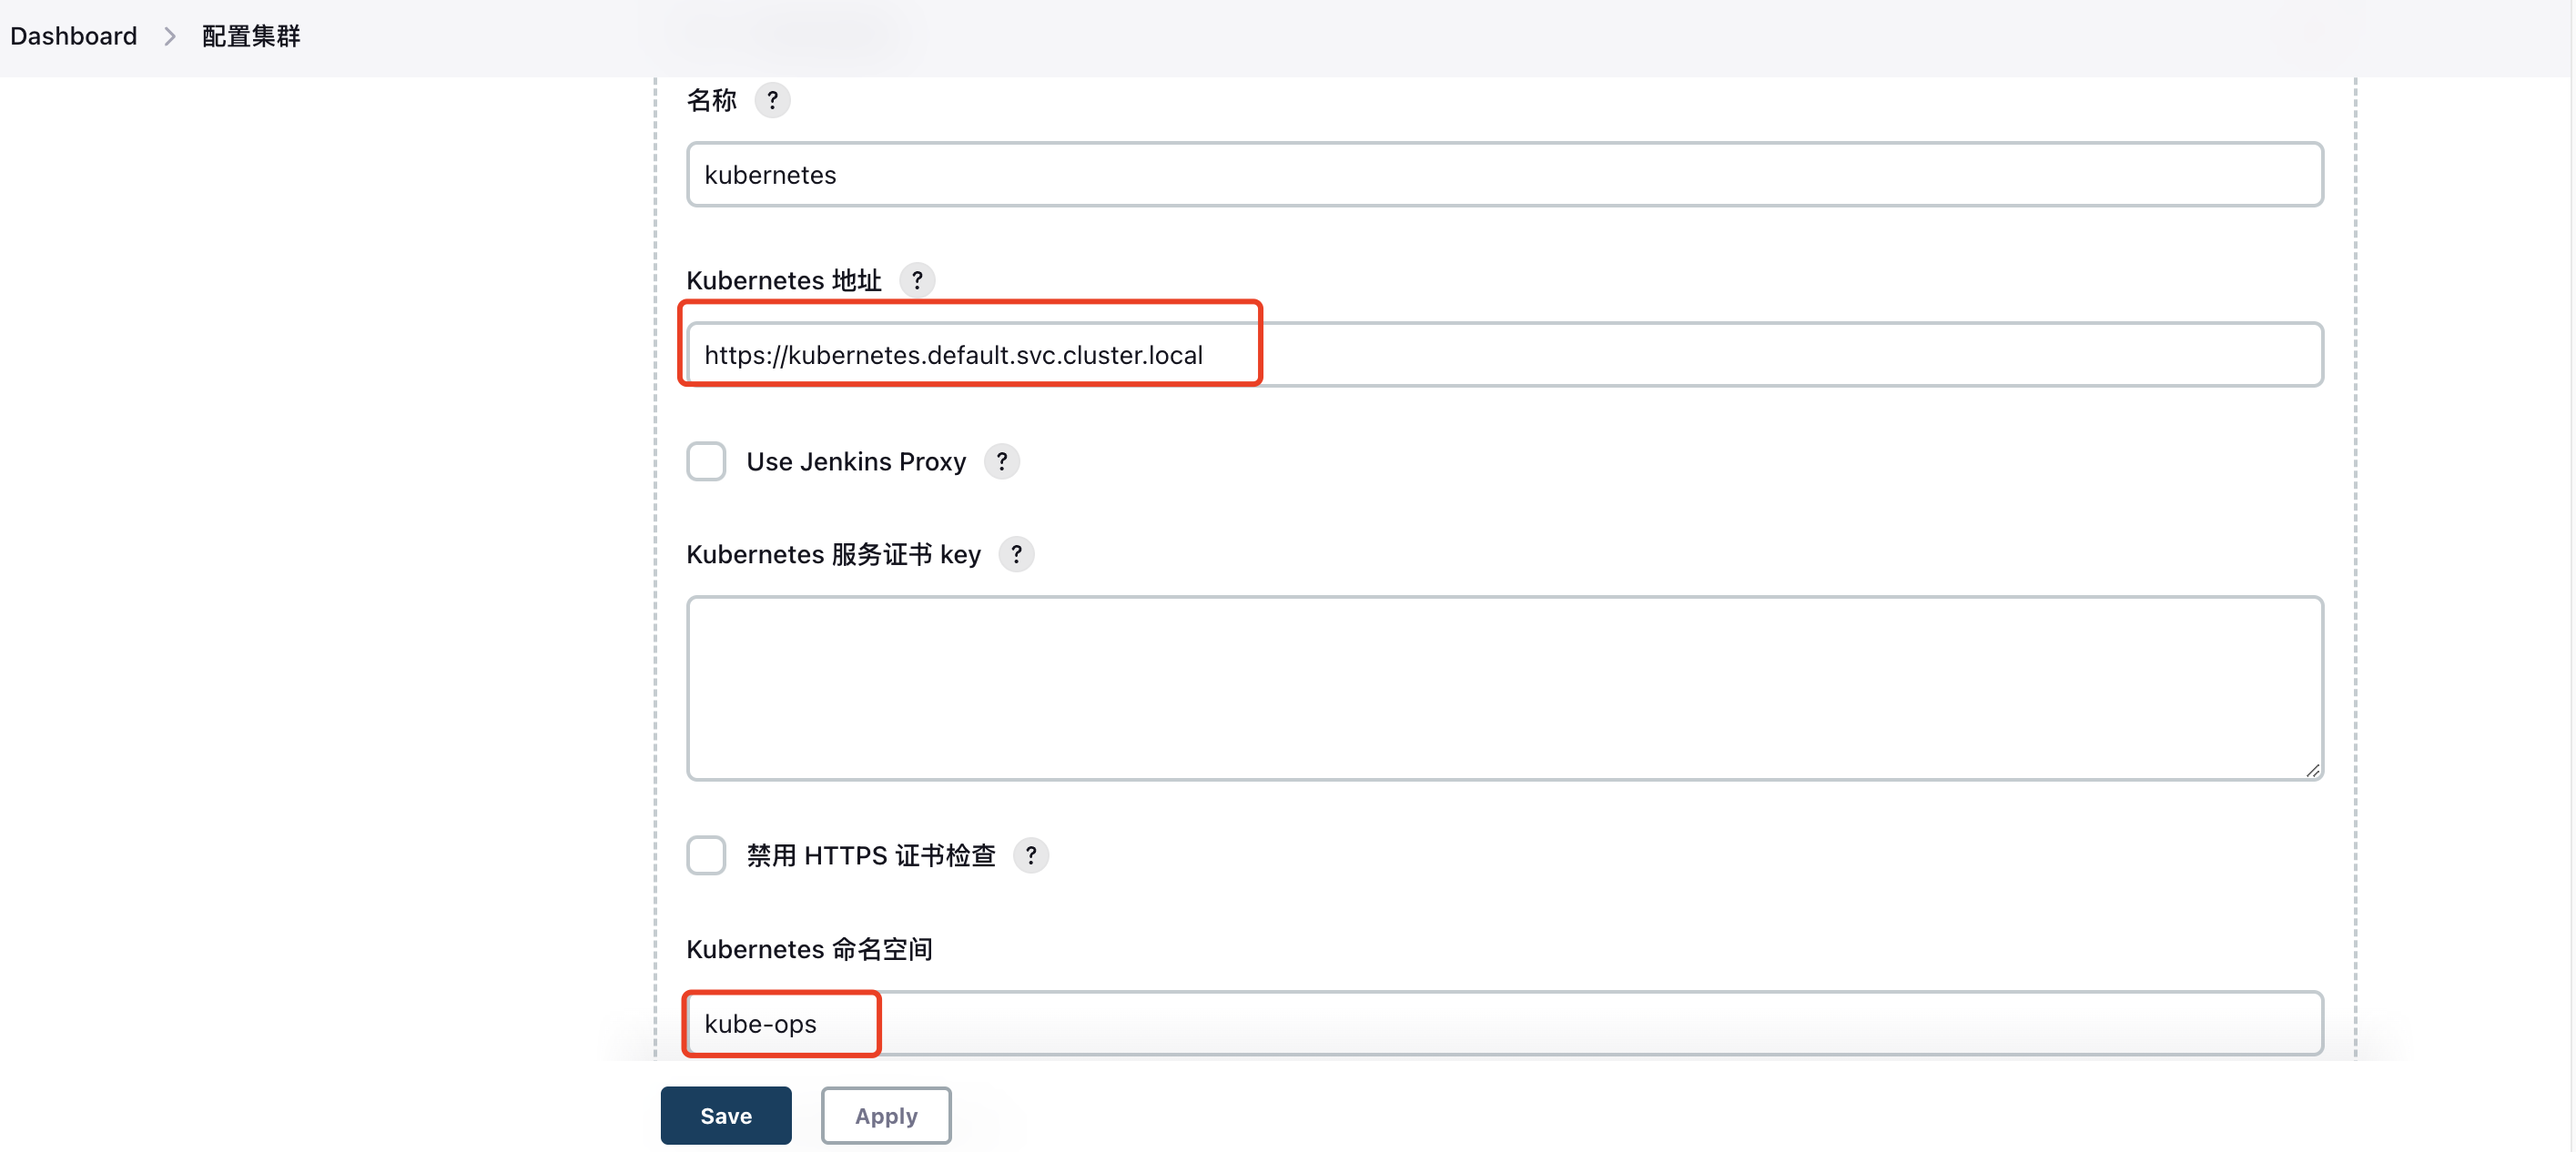
2. Jenkins address configuration
Configure the Jenkins call address in the k8s cluster and the Jenkins channel address:
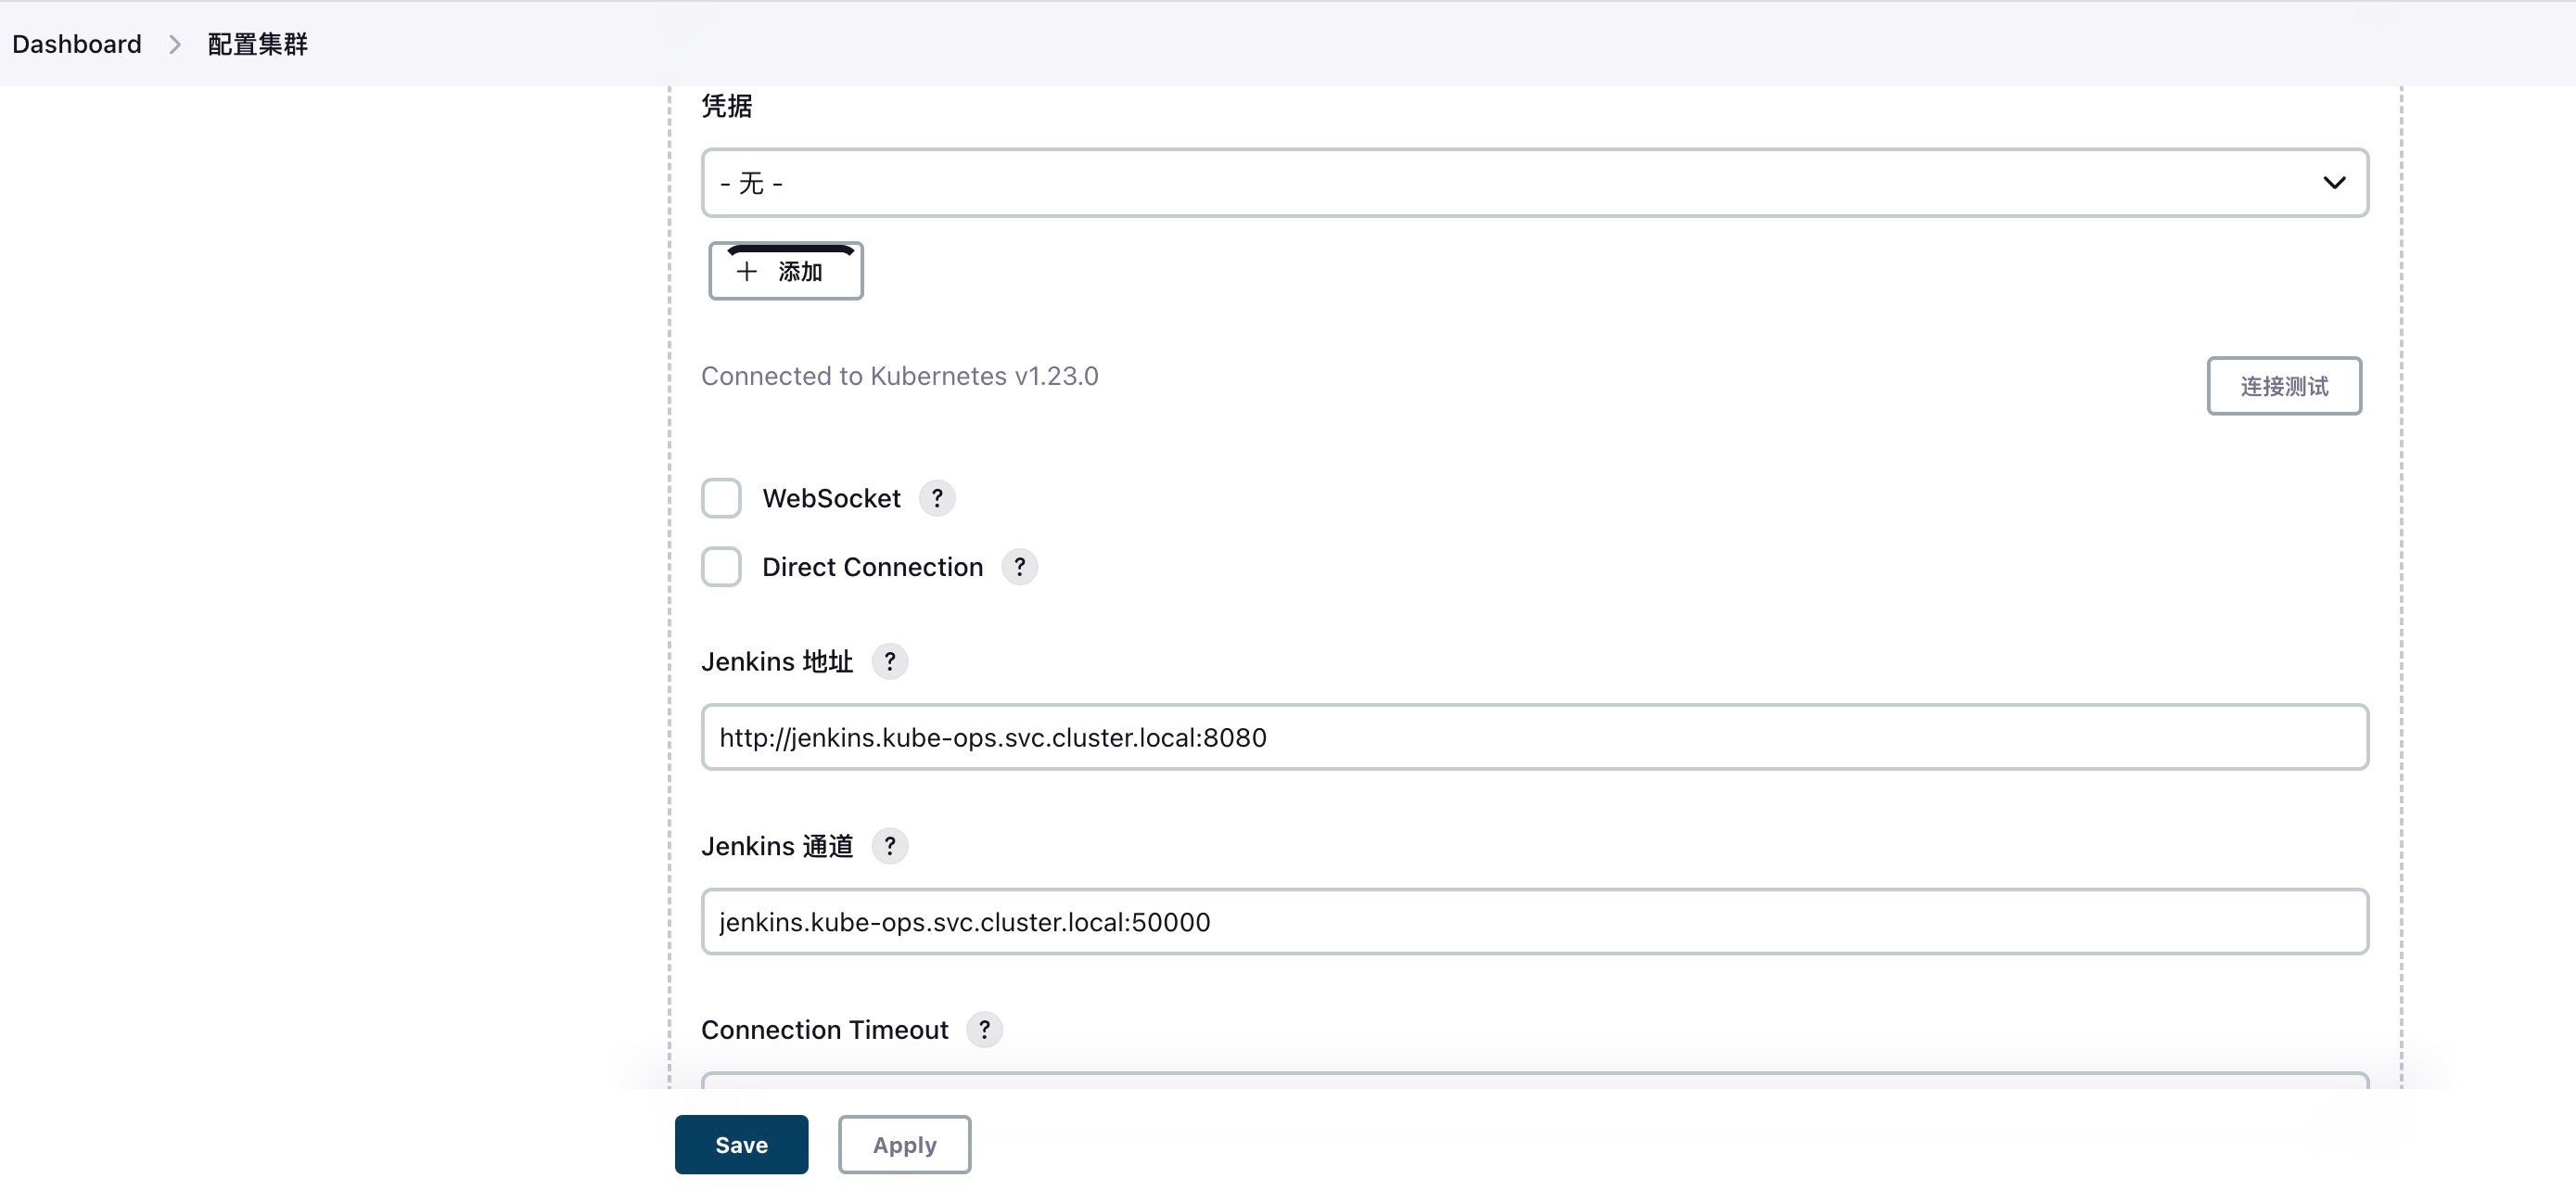
3. Pod Template configuration
Mainly configure namespace and label
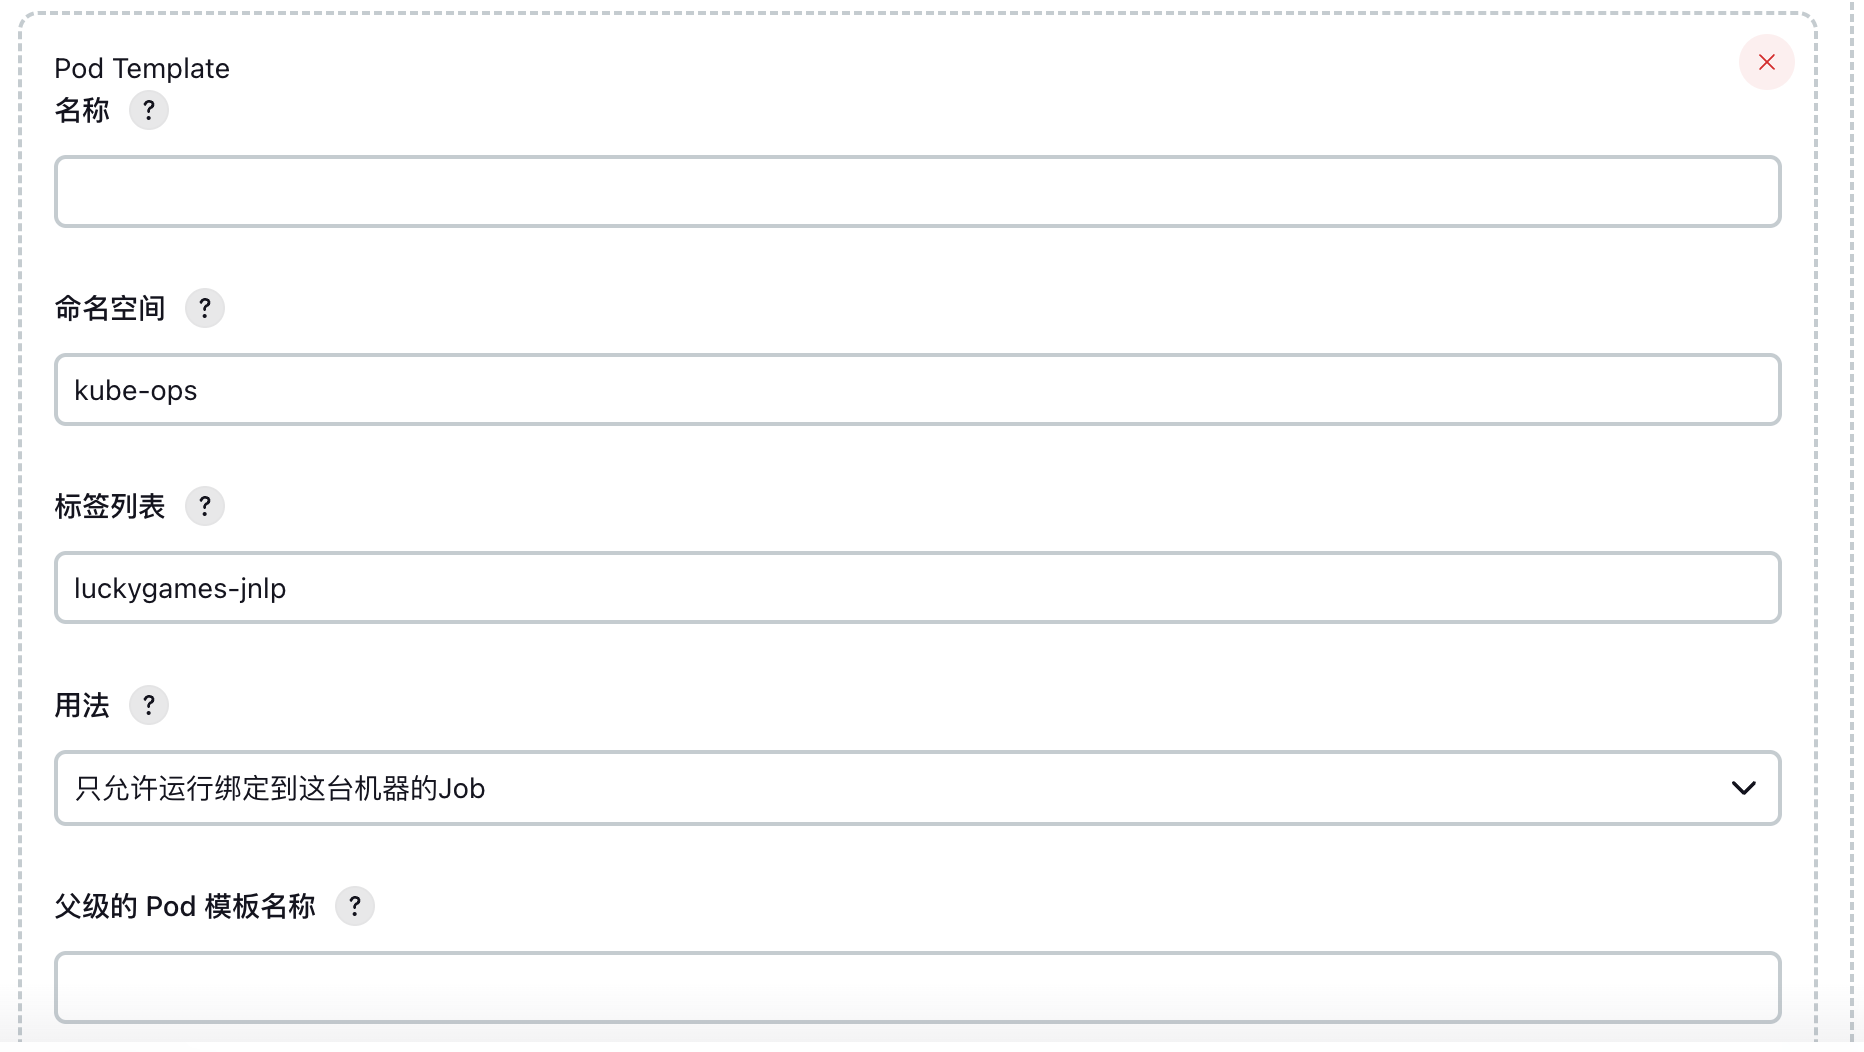
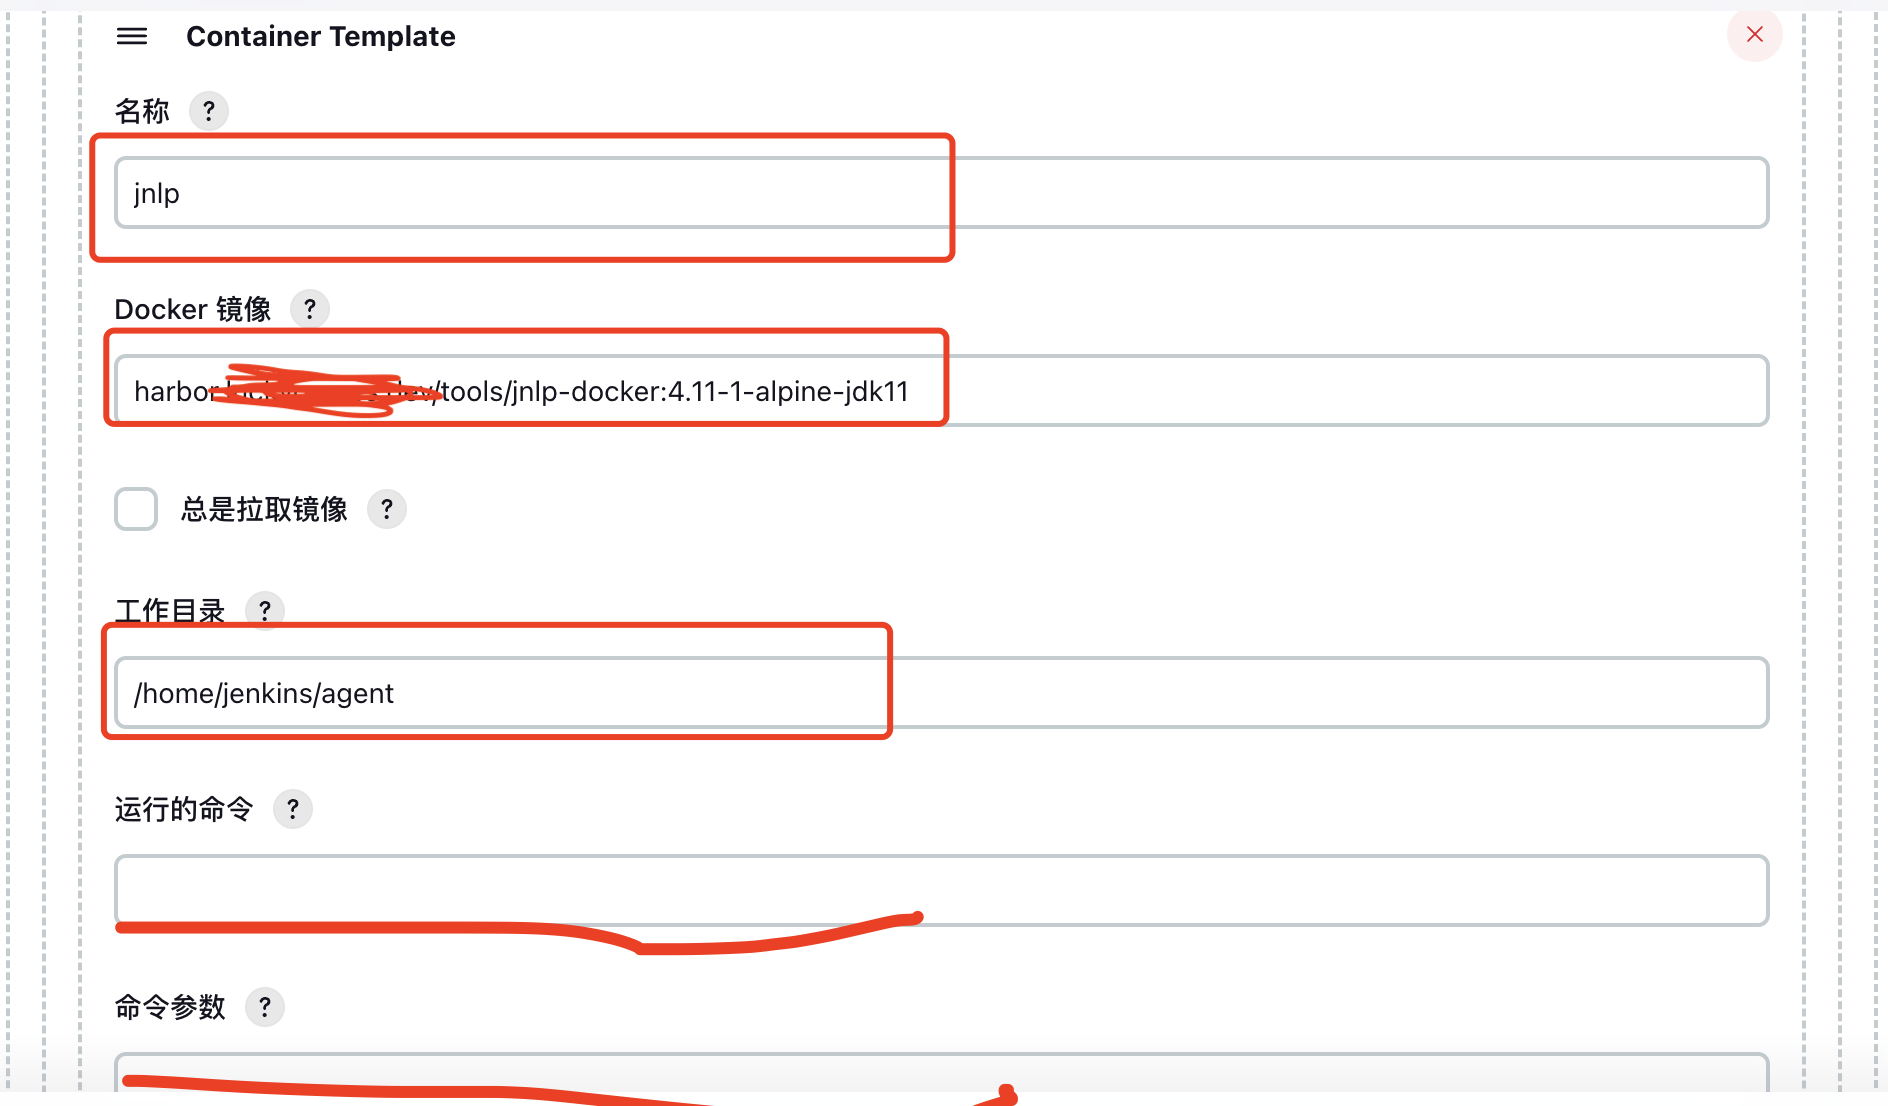
4. Container Template configuration
Mainly configure the slave build container information. Note that the container name must be jnlp.
I built the Docker image myself, which integrates tools such as docker and kubectl. In addition, you need to pay attention to the running command and leave the command parameters blank, otherwise the container creation will fail.
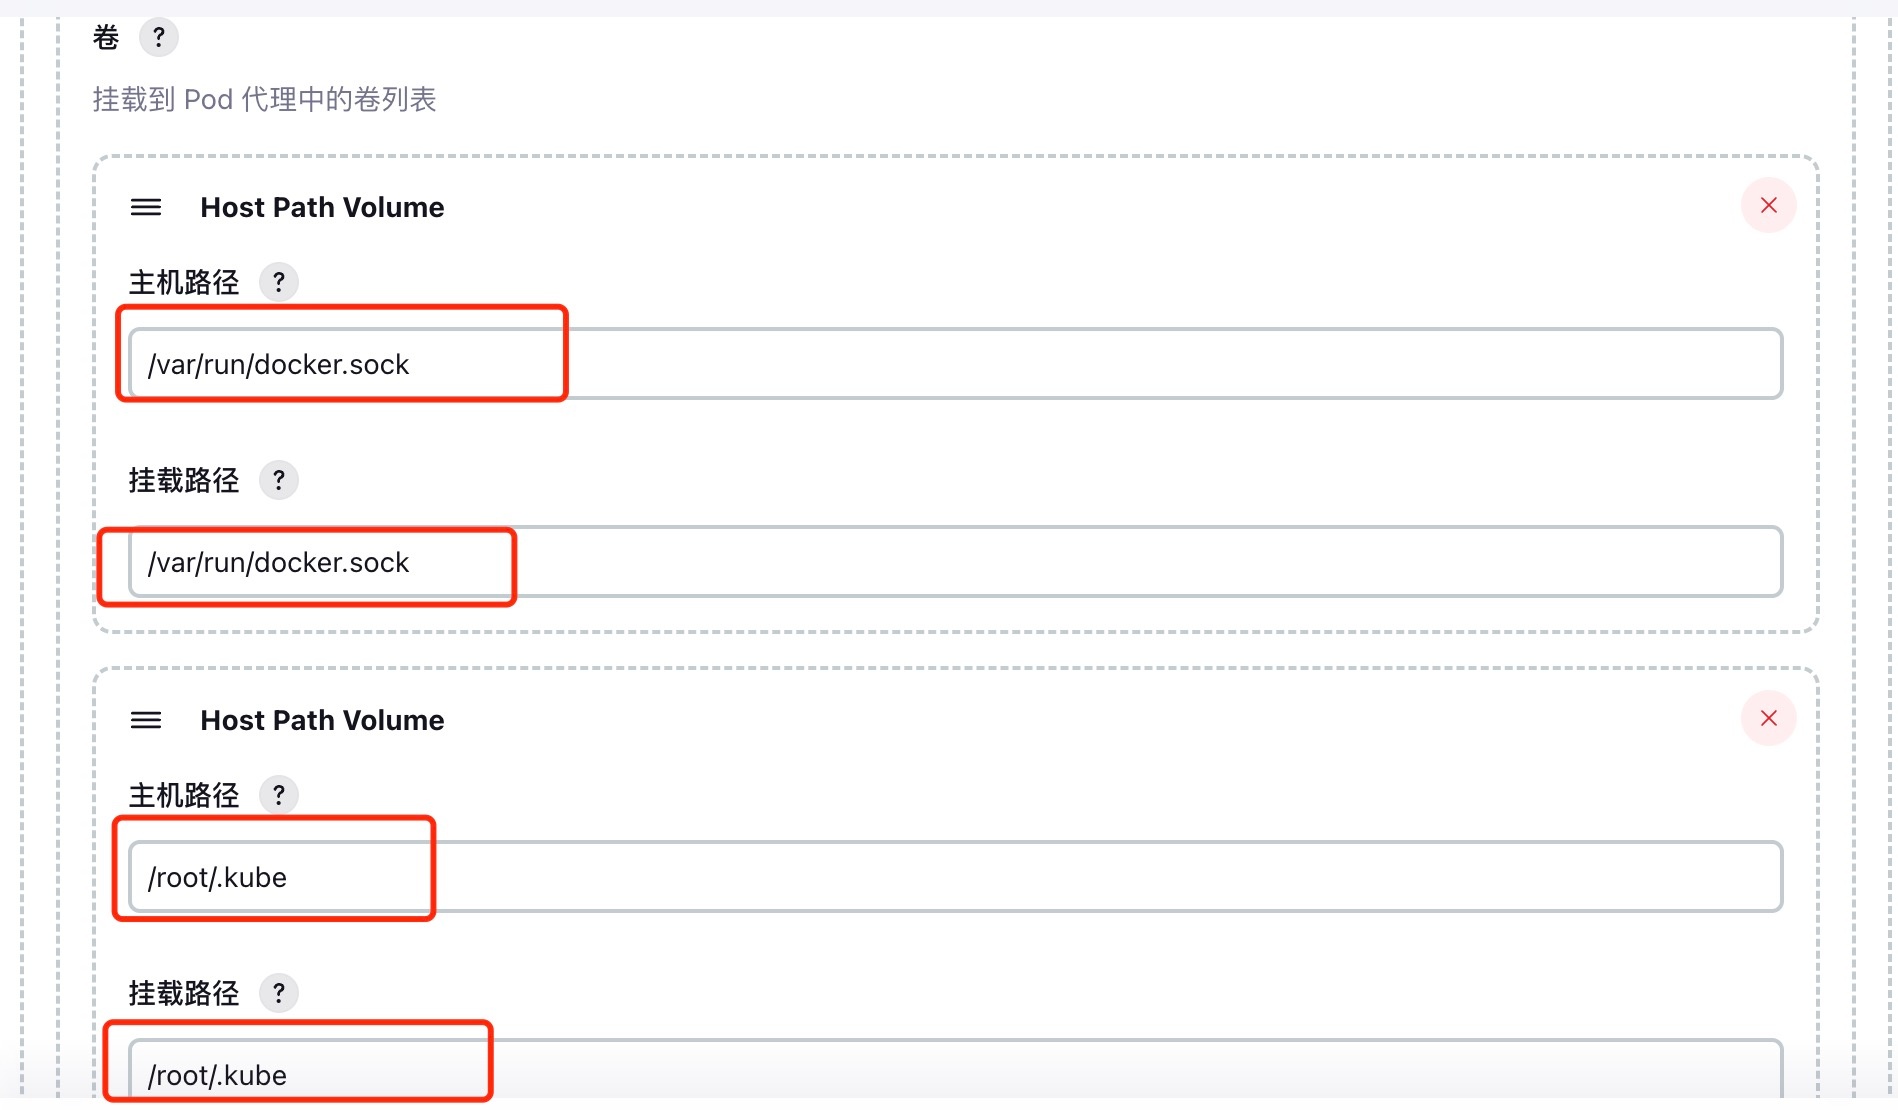
Configure volumes, mount docker socket files, share host docker (Docker in docker); mount kubeconfig configuration, mainly to facilitate kubectl, helm and other commands to operate k8s cluster resources.
Finally, configure the service account to Jenkins. This account is the name when we created jenkins before.
3. Simple test
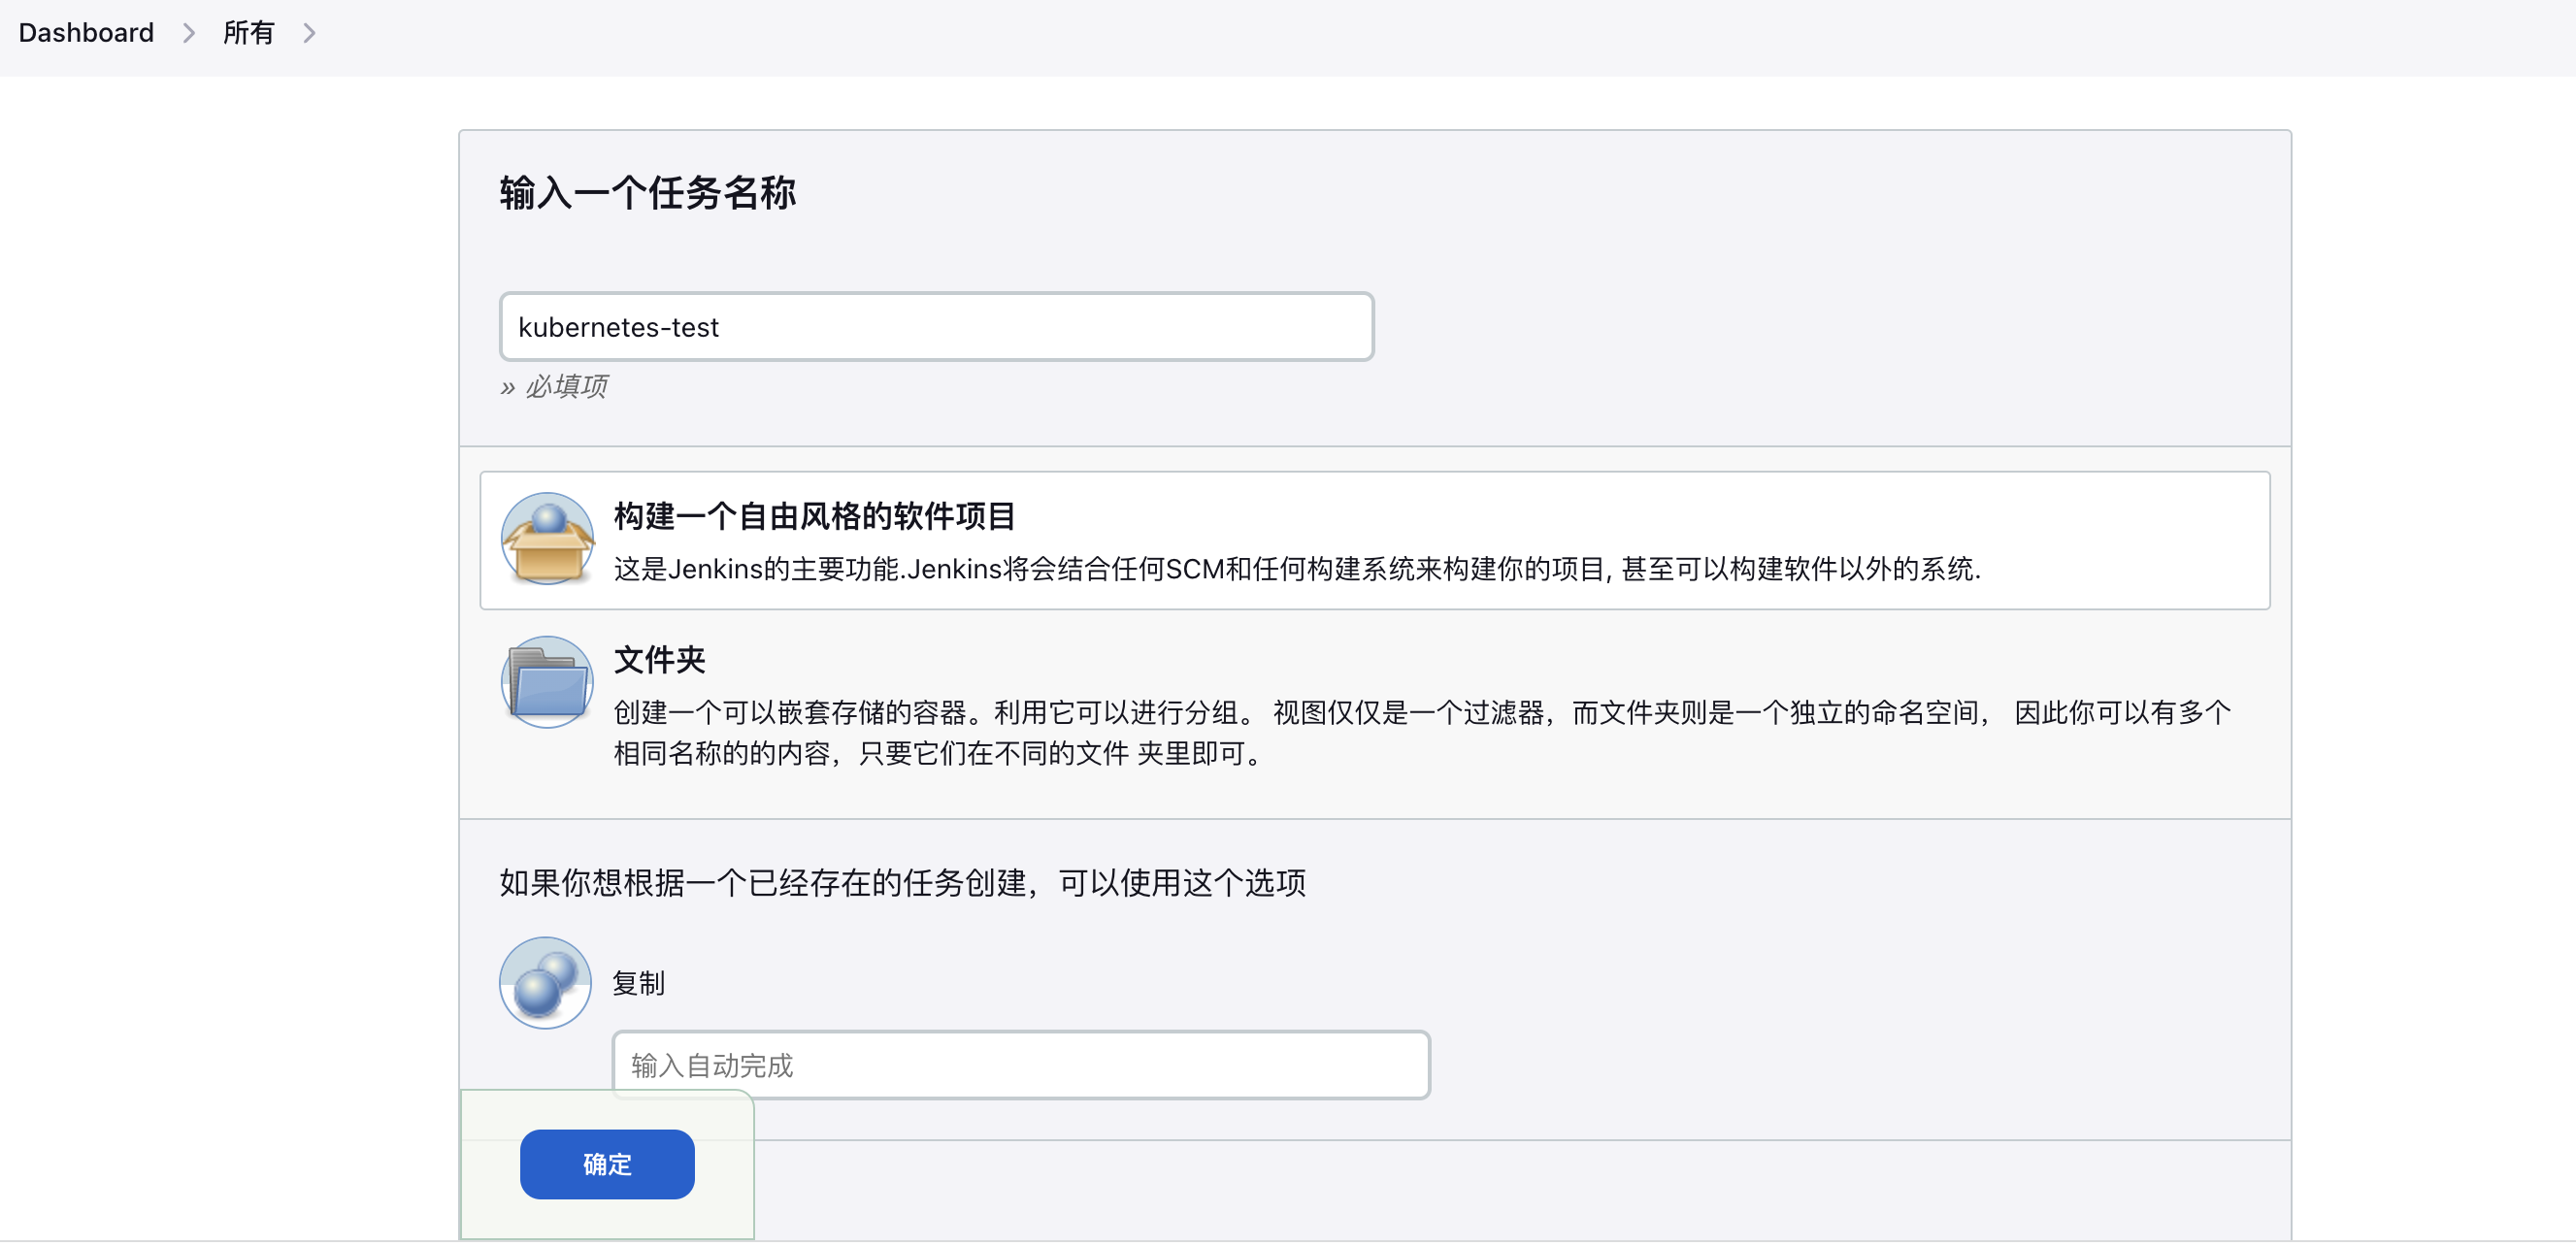
1. Create a free-style Job task
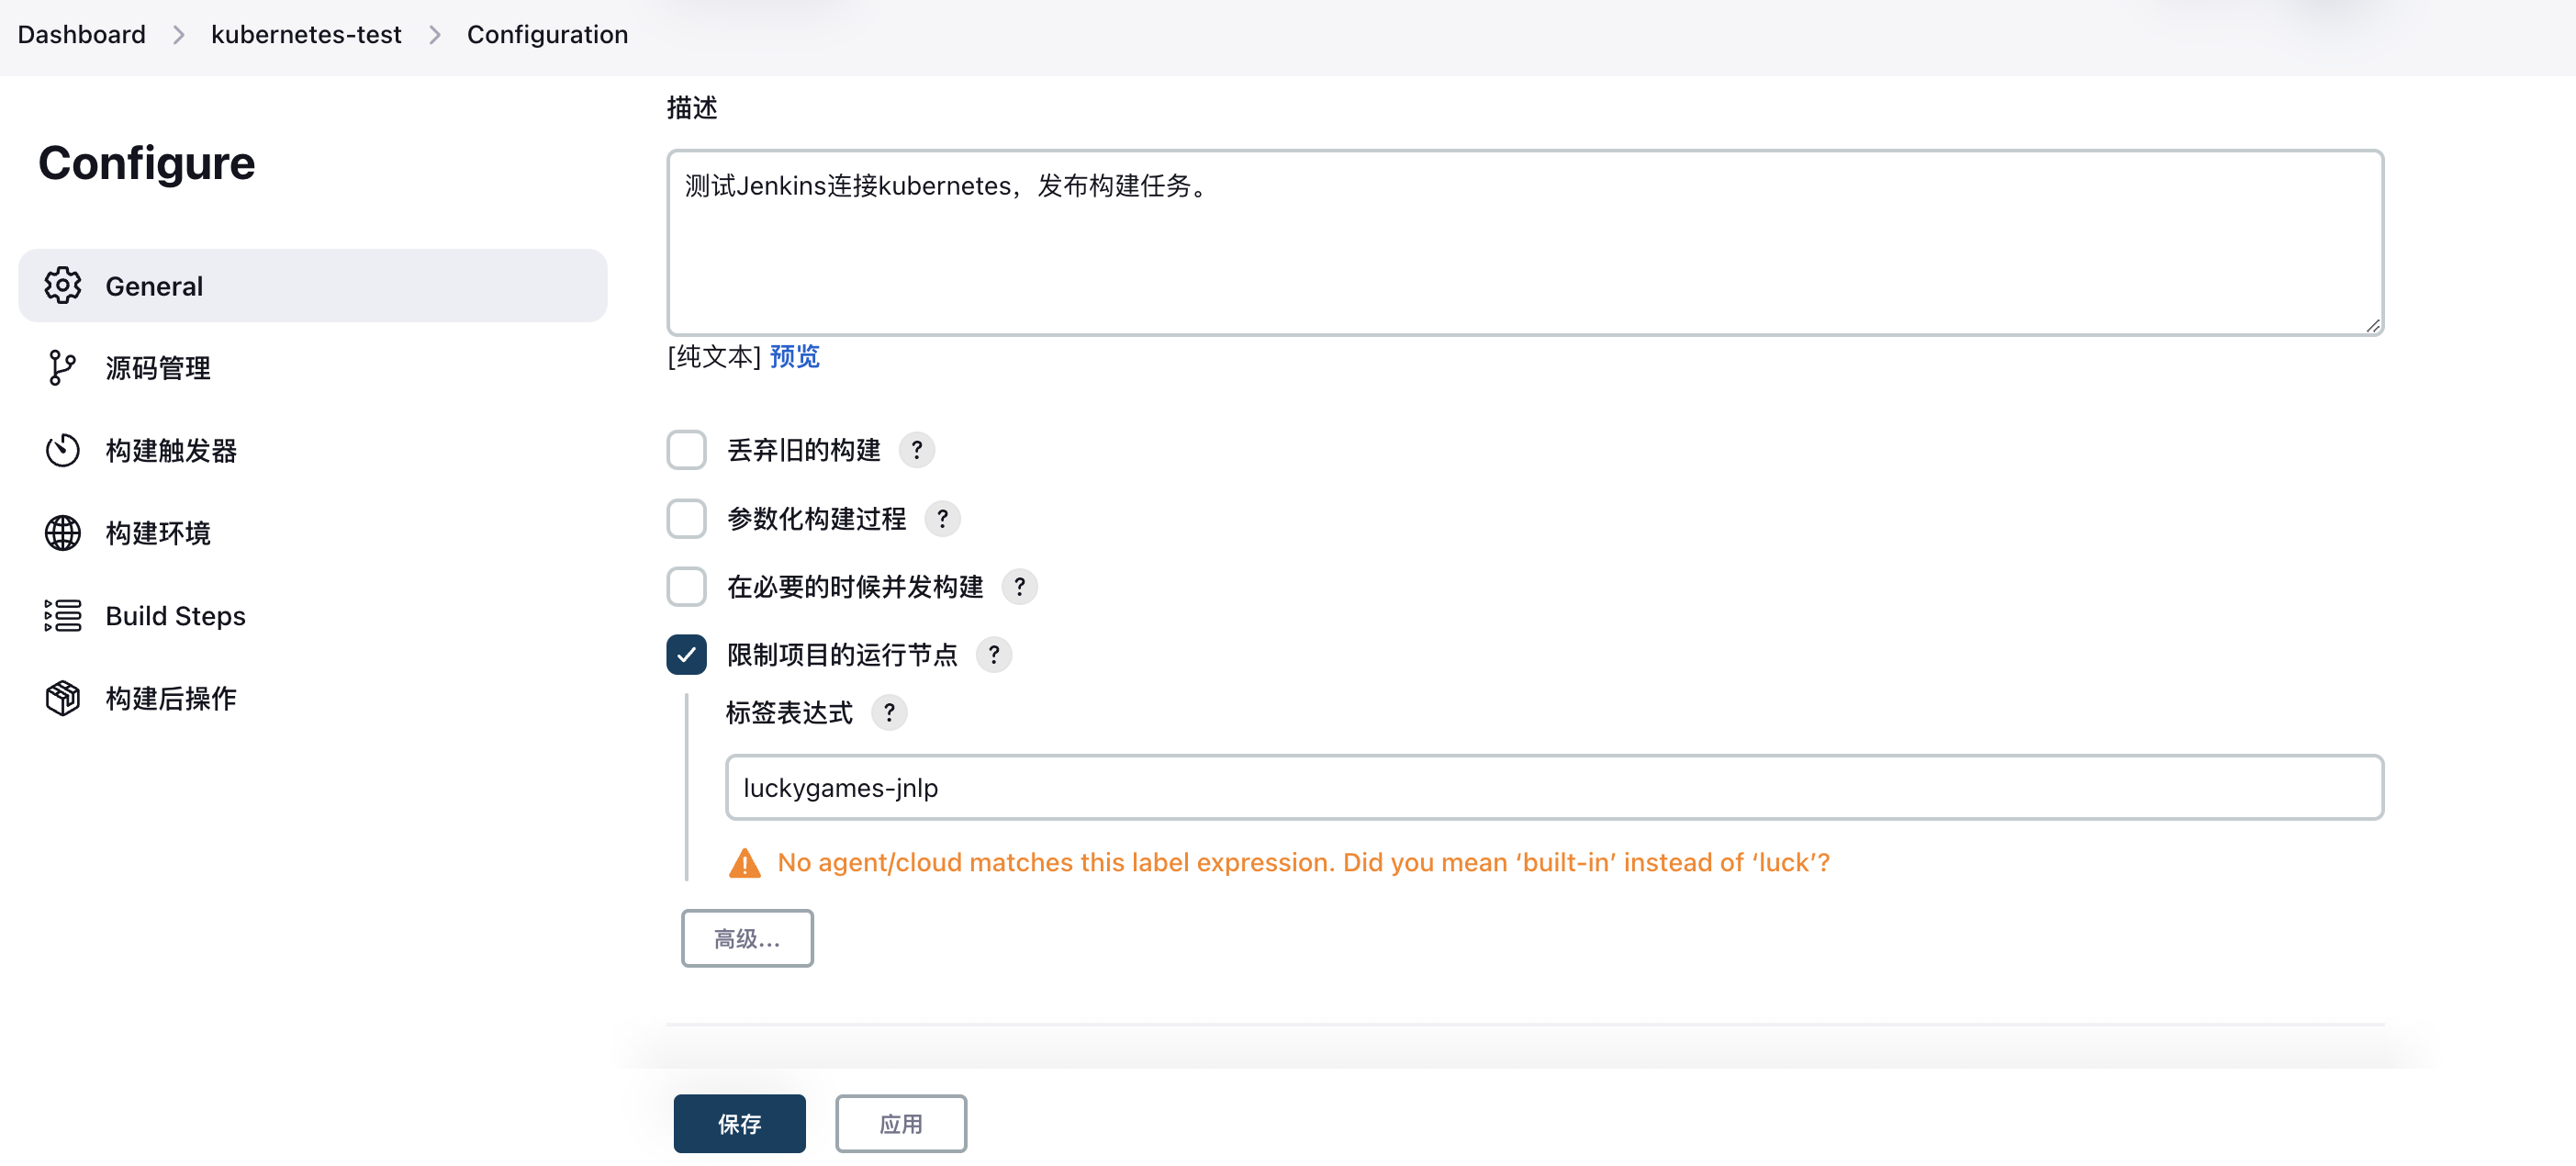
2. Bind Slave Pod
3. Configure shell test command
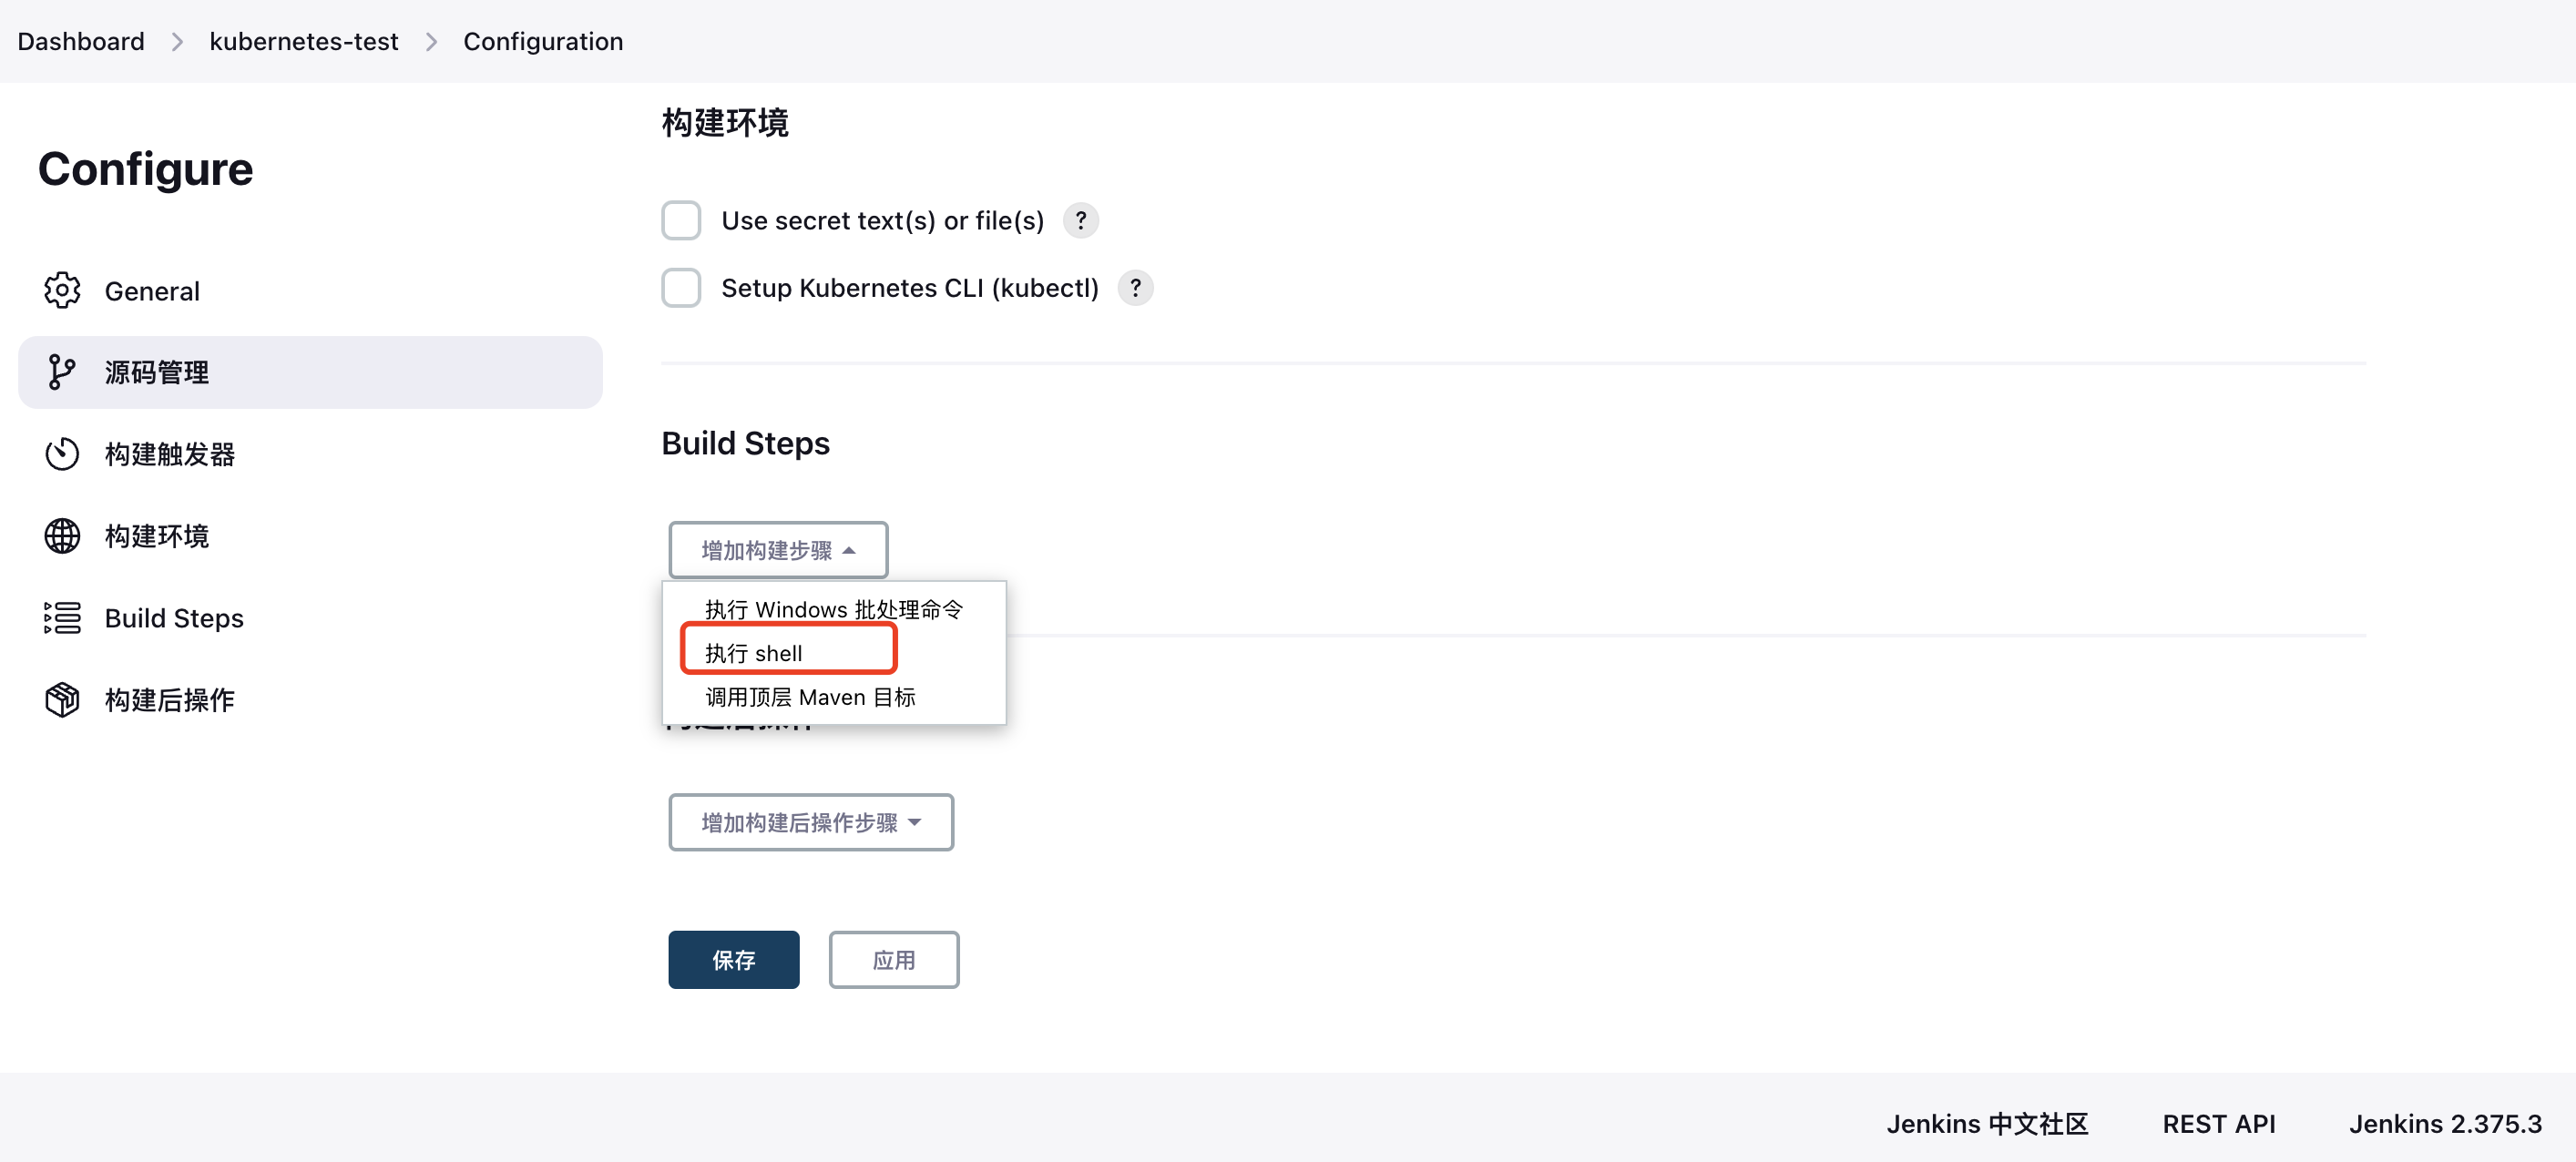
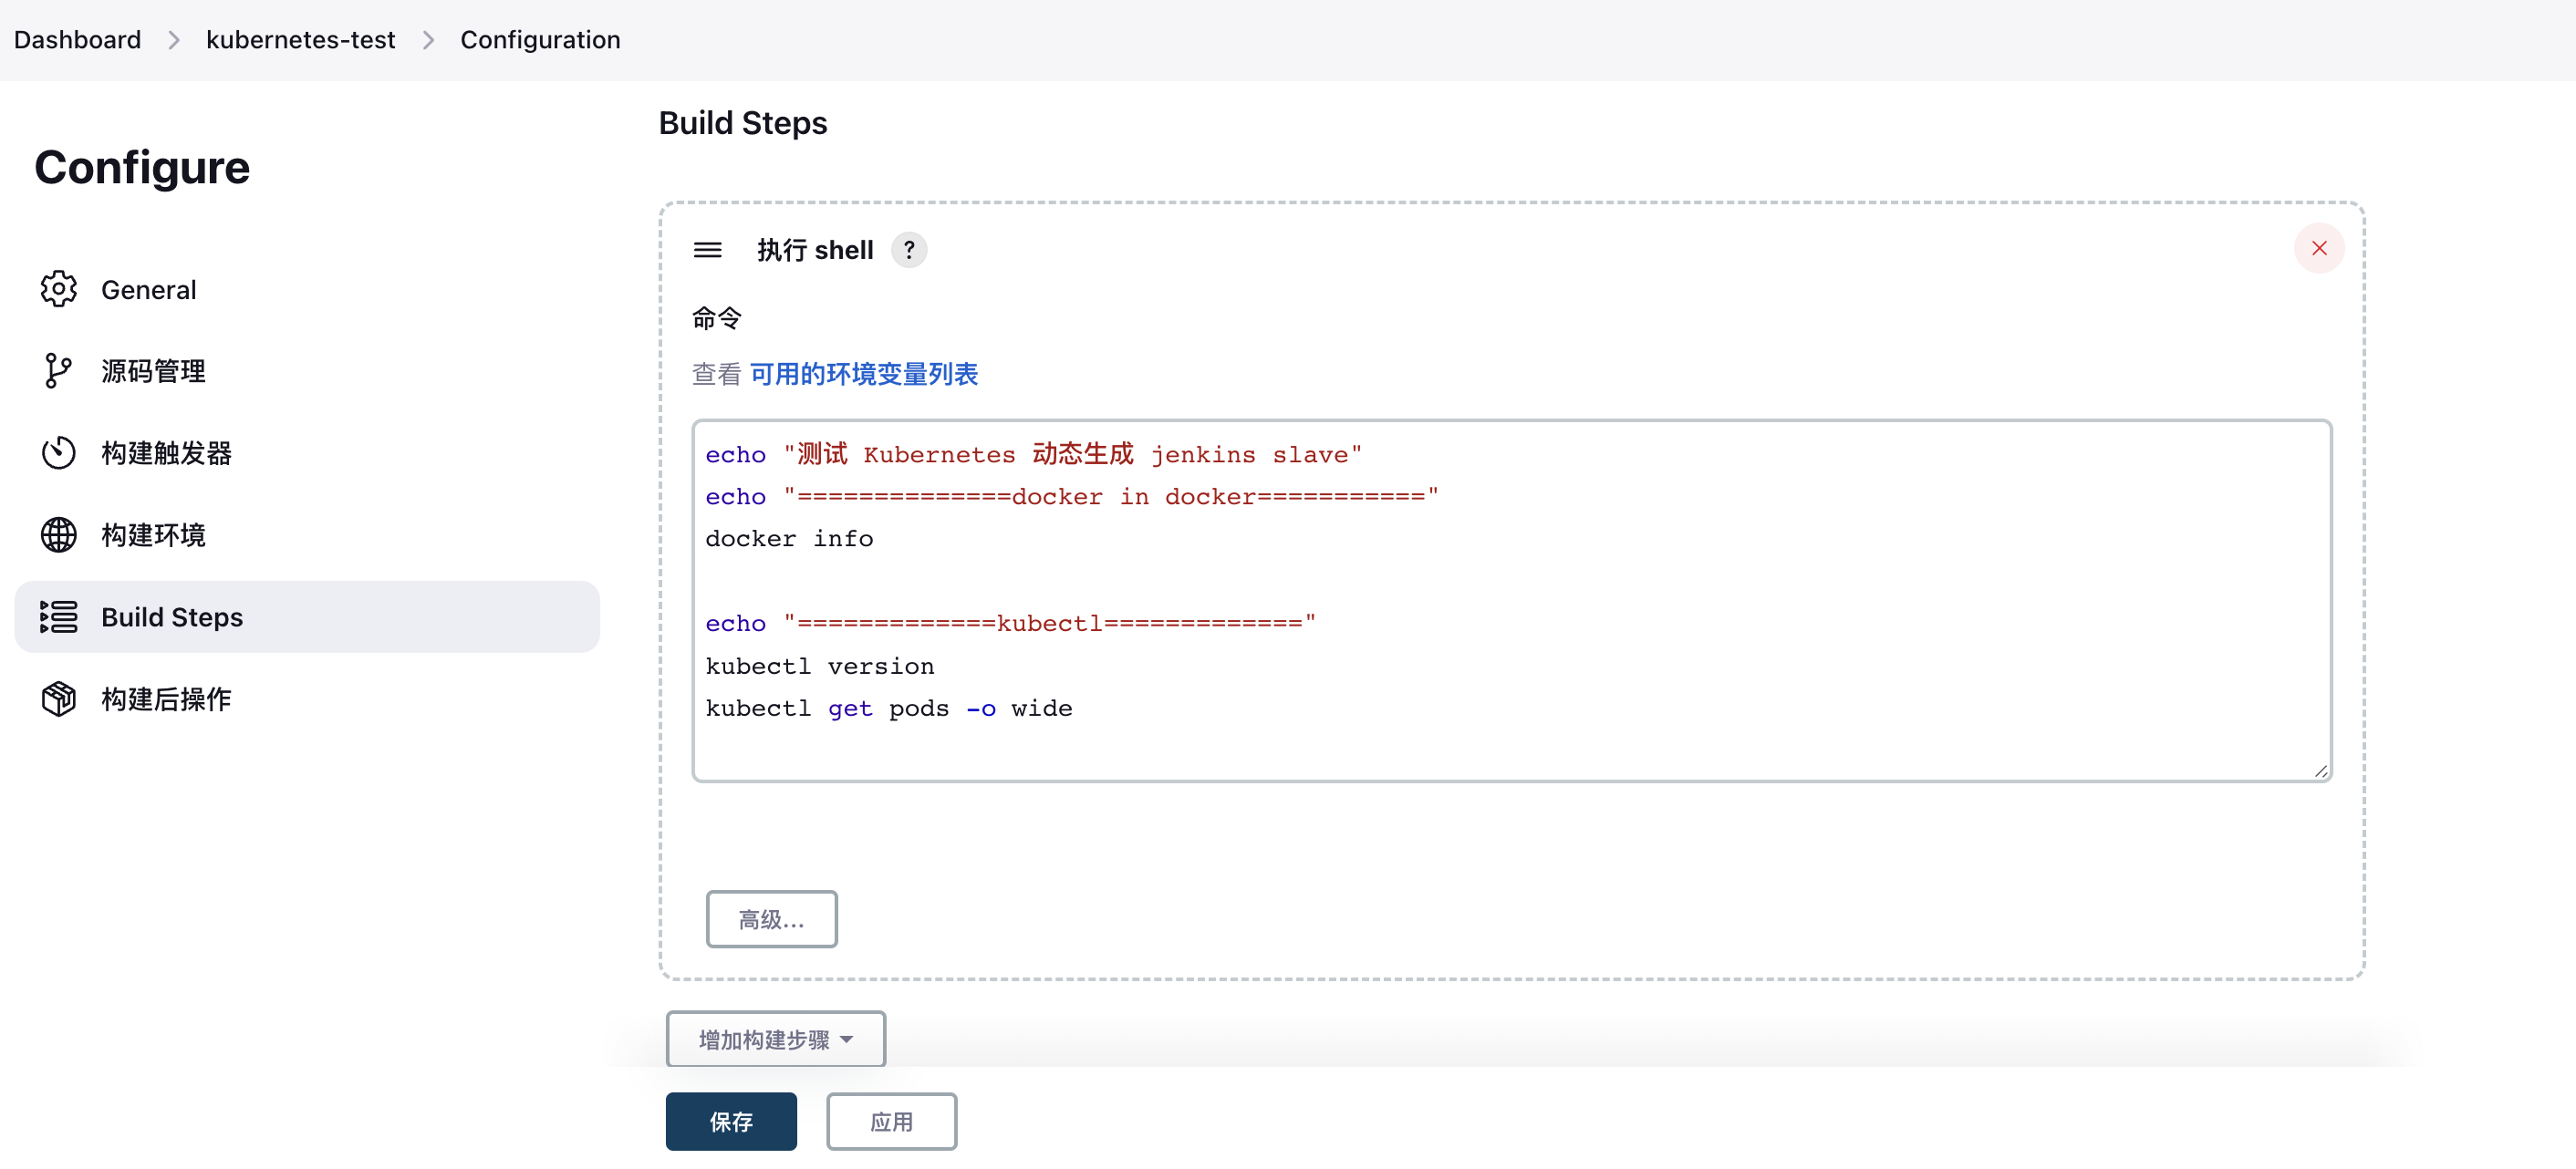
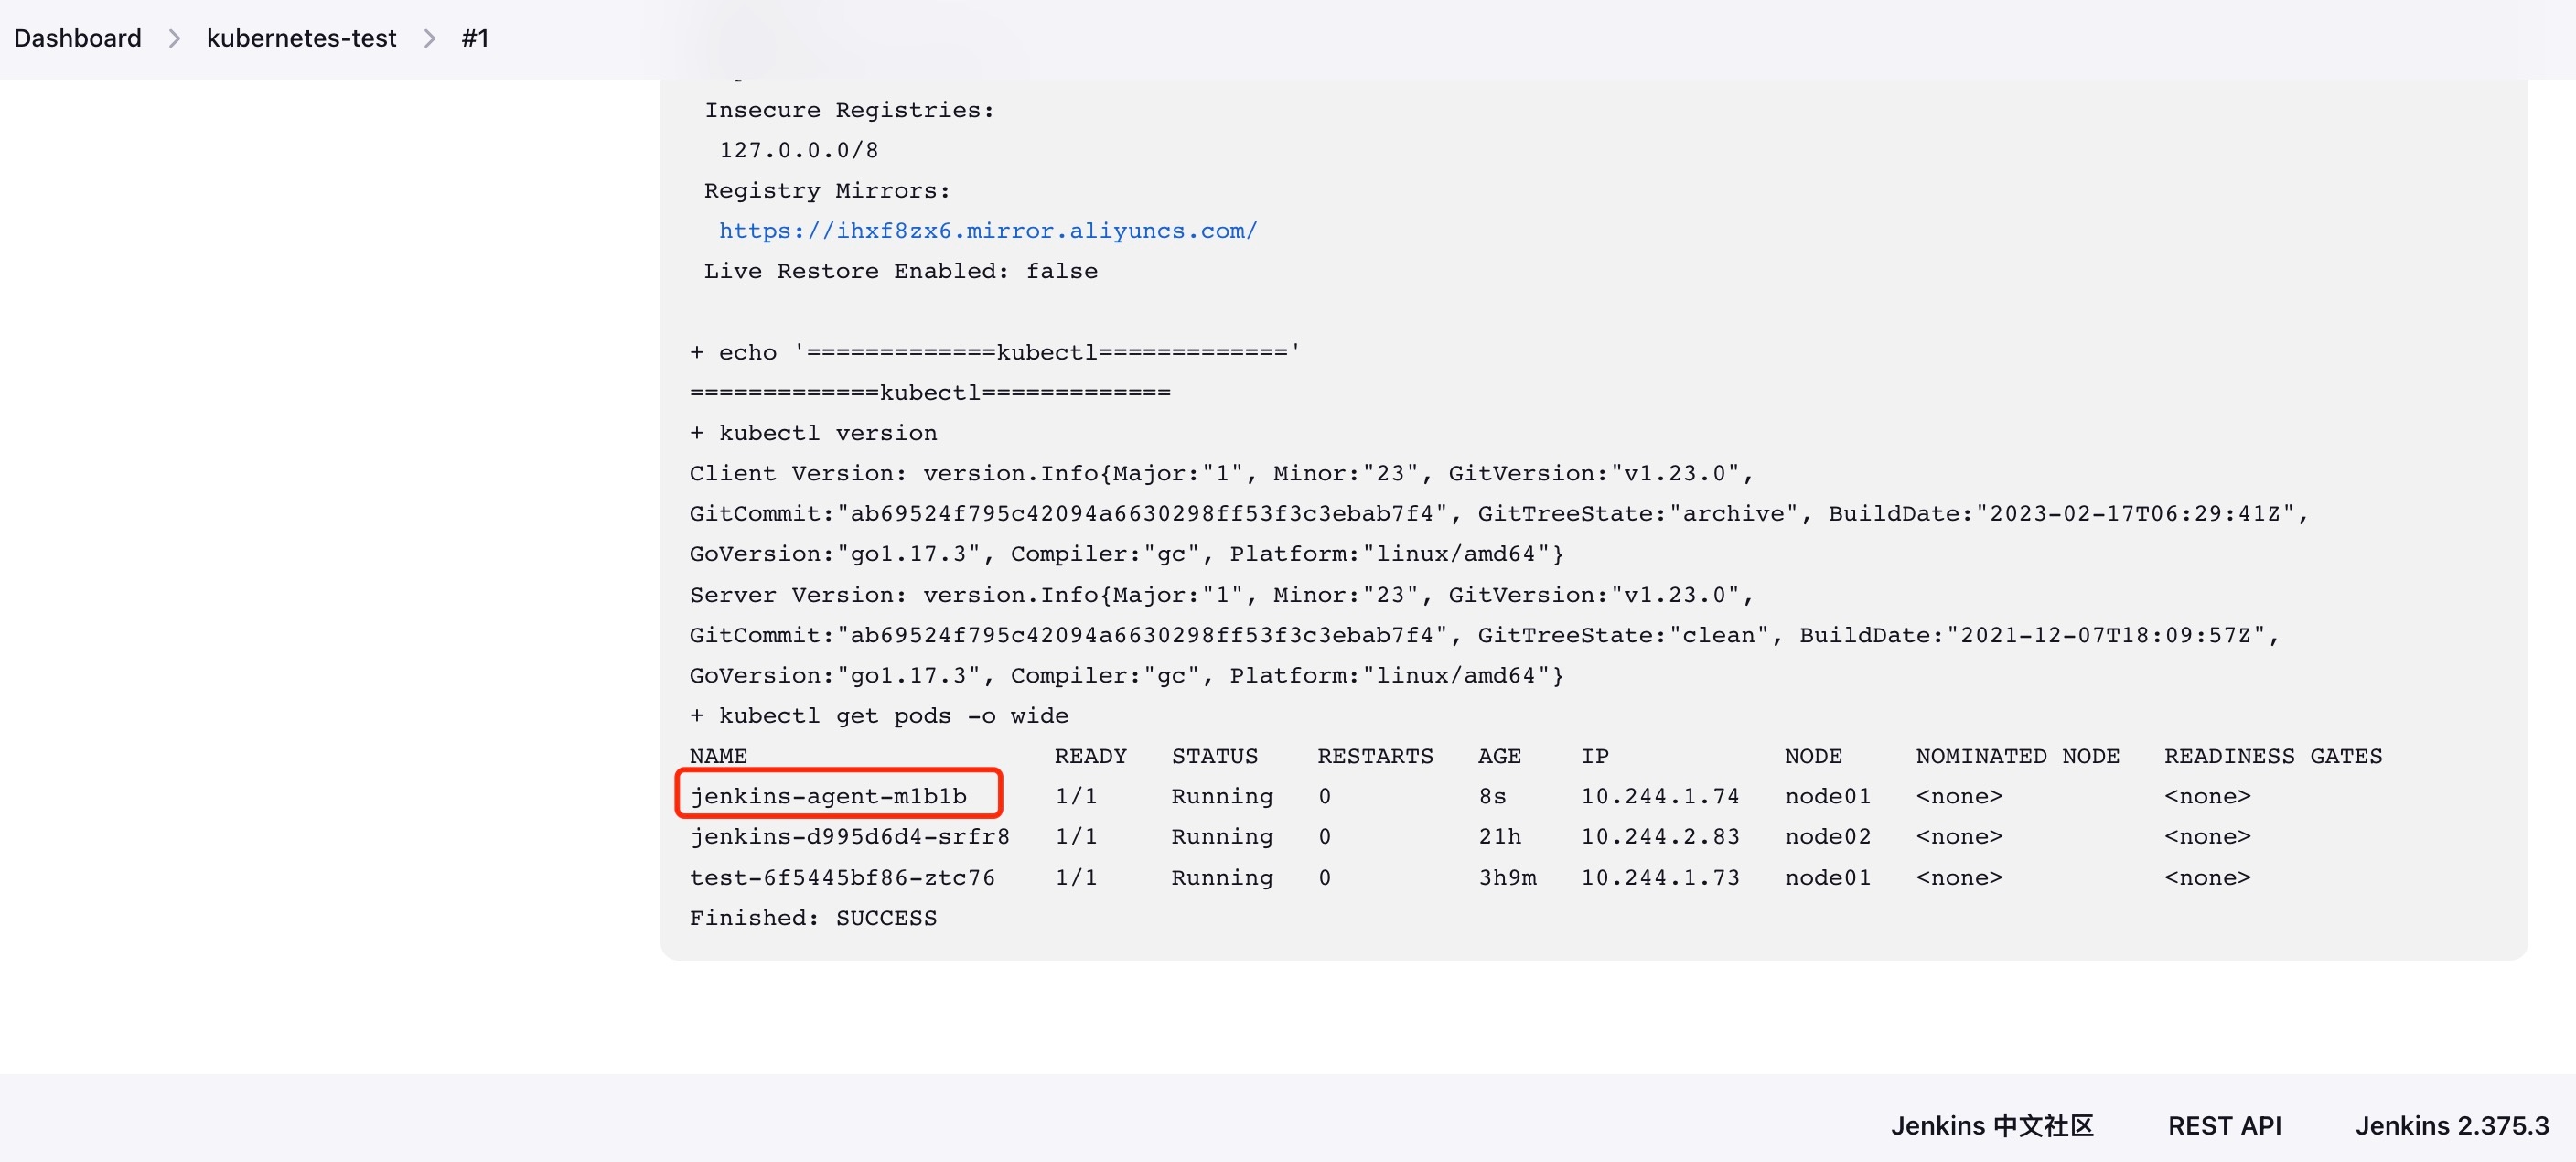
4. Execute a build task
After the execution is completed, we check the task build history and find that a slave pod is automatically created during this process. At the same time, after the task is completed, the Pod will also be automatically destroyed.
4. Summary:
Continuous construction and release are essential steps in the daily R&D system. At present, most companies use Jenkins clusters to build CICD environments. The traditional Jenkins Slave one master and multiple slaves method will have some pain points, such as:
The master has a single point failure, and the entire process is unavailable
Each Slave has a different configuration environment to complete operations such as compilation and packaging in different languages, but these differentiated configurations make management very inconvenient and maintenance difficult
Unbalanced resource allocation, some Slave jobs are waiting in line, while some Slave are idle
Resources are wasted, each Slave may be a physical machine or a virtual machine, and when the Slave is idle, the resources will not be completely released.
Because of the above pain points, we are eager for a more efficient and reliable way to complete the CI/CD process. Docker virtualization container technology can solve this pain point well, especially in the Kubernetes cluster environment. It can better solve the above problems. The following figure is a simple schematic diagram of building a Jenkins cluster based on Kubernetes: 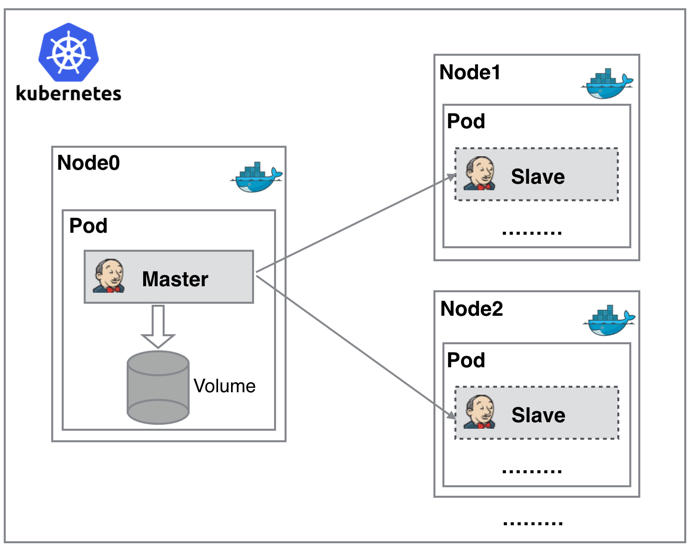 From the figure, we can see that Jenkins Master and Jenkins Slave run on the Node of the Kubernetes cluster in the form of Pod. The Master runs on one of the nodes and stores its configuration data in a Volume. The Slave runs on each node, and it is not always in operation. It will be dynamically created and automatically deleted according to demand. The workflow of this method is roughly as follows: when Jenkins Master receives a Build request, it will dynamically create a Jenkins Slave running in the Pod according to the configured Label and register it with the Master. After the Job is completed, the Slave will be deregistered and the Pod will be automatically deleted and restored to its original state.
So what benefits do we get from using this method?
High service availability. When the Jenkins Master fails, Kubernetes will automatically create a new Jenkins Master container and allocate the Volume to the newly created container to ensure that data is not lost, thereby achieving high availability of cluster services.
Dynamic scaling and reasonable use of resources. Each time a Job is run, a Jenkins Slave will be automatically created. After the Job is completed, the Slave will automatically deregister and delete the container, and the resources will be automatically released. In addition, Kubernetes will dynamically allocate Slaves to idle nodes for creation based on the usage of each resource, reducing the situation where the resource utilization of a certain node is high and the nodes are still waiting in line on that node.
Good scalability. When the resources of the Kubernetes cluster are seriously insufficient and the jobs are waiting in line, you can easily add a Kubernetes Node to the cluster to achieve expansion. Are all the problems we faced before gone under the Kubernetes
cluster environment? It looks perfect.
Finally, the CICD containerized deployment solution based on Jenkins + Kubernetes has certain advantages in terms of workflow and resource costs.